
 Schools Tender Snowplough kit")
")
 Conflat D kit")


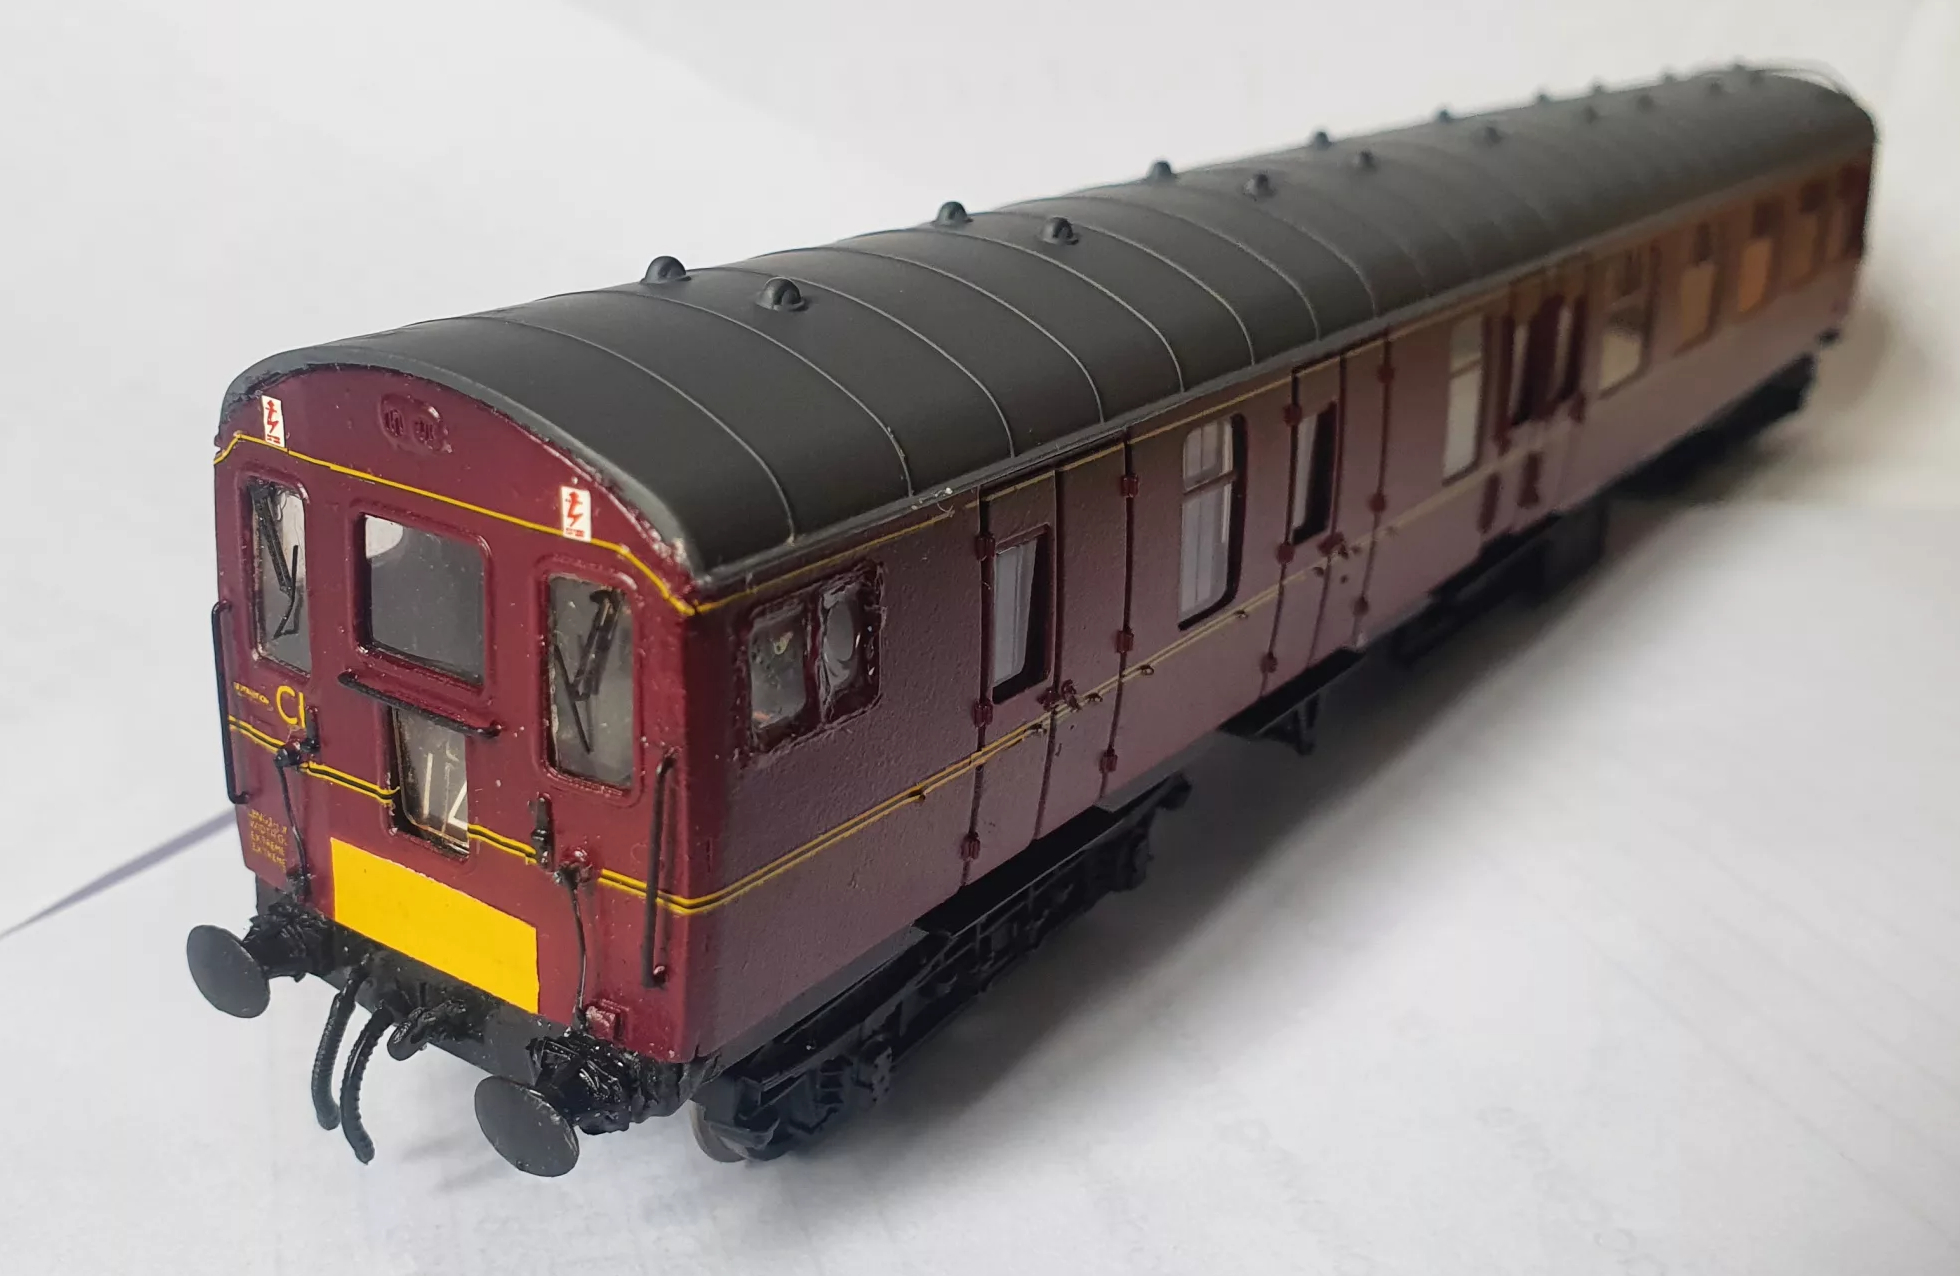
Laboratory 2 seems an odd choice for Hornby to model as it saw very little active service within the Railway Technical Centre and was withdrawn from RTC service quite early. It was involved in some TIAM heavy duty MK1 style bogie trials at some point, but apart from that, little is known of its uses. It was due to be named ‘Electra’ but this never materialised.
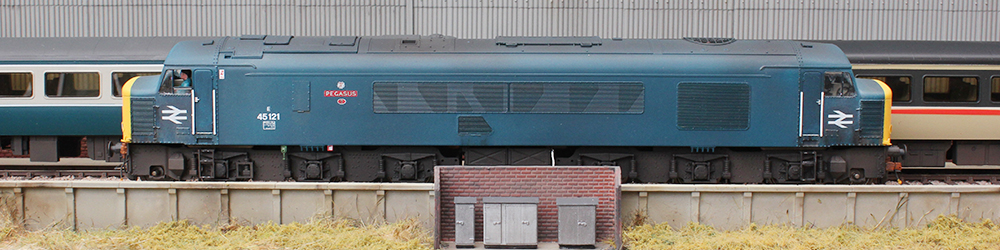
There has been a lot of debate elsewhere previously regarding Hornby’s version of Rail Blue. This article shows some quick wins for how this can be improved to some degree without conducting a full respray, and we can also add some extra detailing if required.

The bogies easily clip off the main underframe and come with NEM pockets on the bogie ends. The first are for improvement is blackening the bright shiny wheels with a suitable matt black or dark weathering colour of choice. This can be done with the wheels in place, or they can be prized out and reinstated in to the bogie frames after painting and the complete bogies put to one side.
The body is removed by clips (4 at the ends, 1 in each corner and 2 in the middle.) Simply pull at one end of the underframe and work along the length of the chassis. The coach interior will then pull out and you are left with an empty bodyshell. You will now see that that body is pre-moulded in a blue colour resembling BR blue. Obviously, it is cheaper to make it this way!
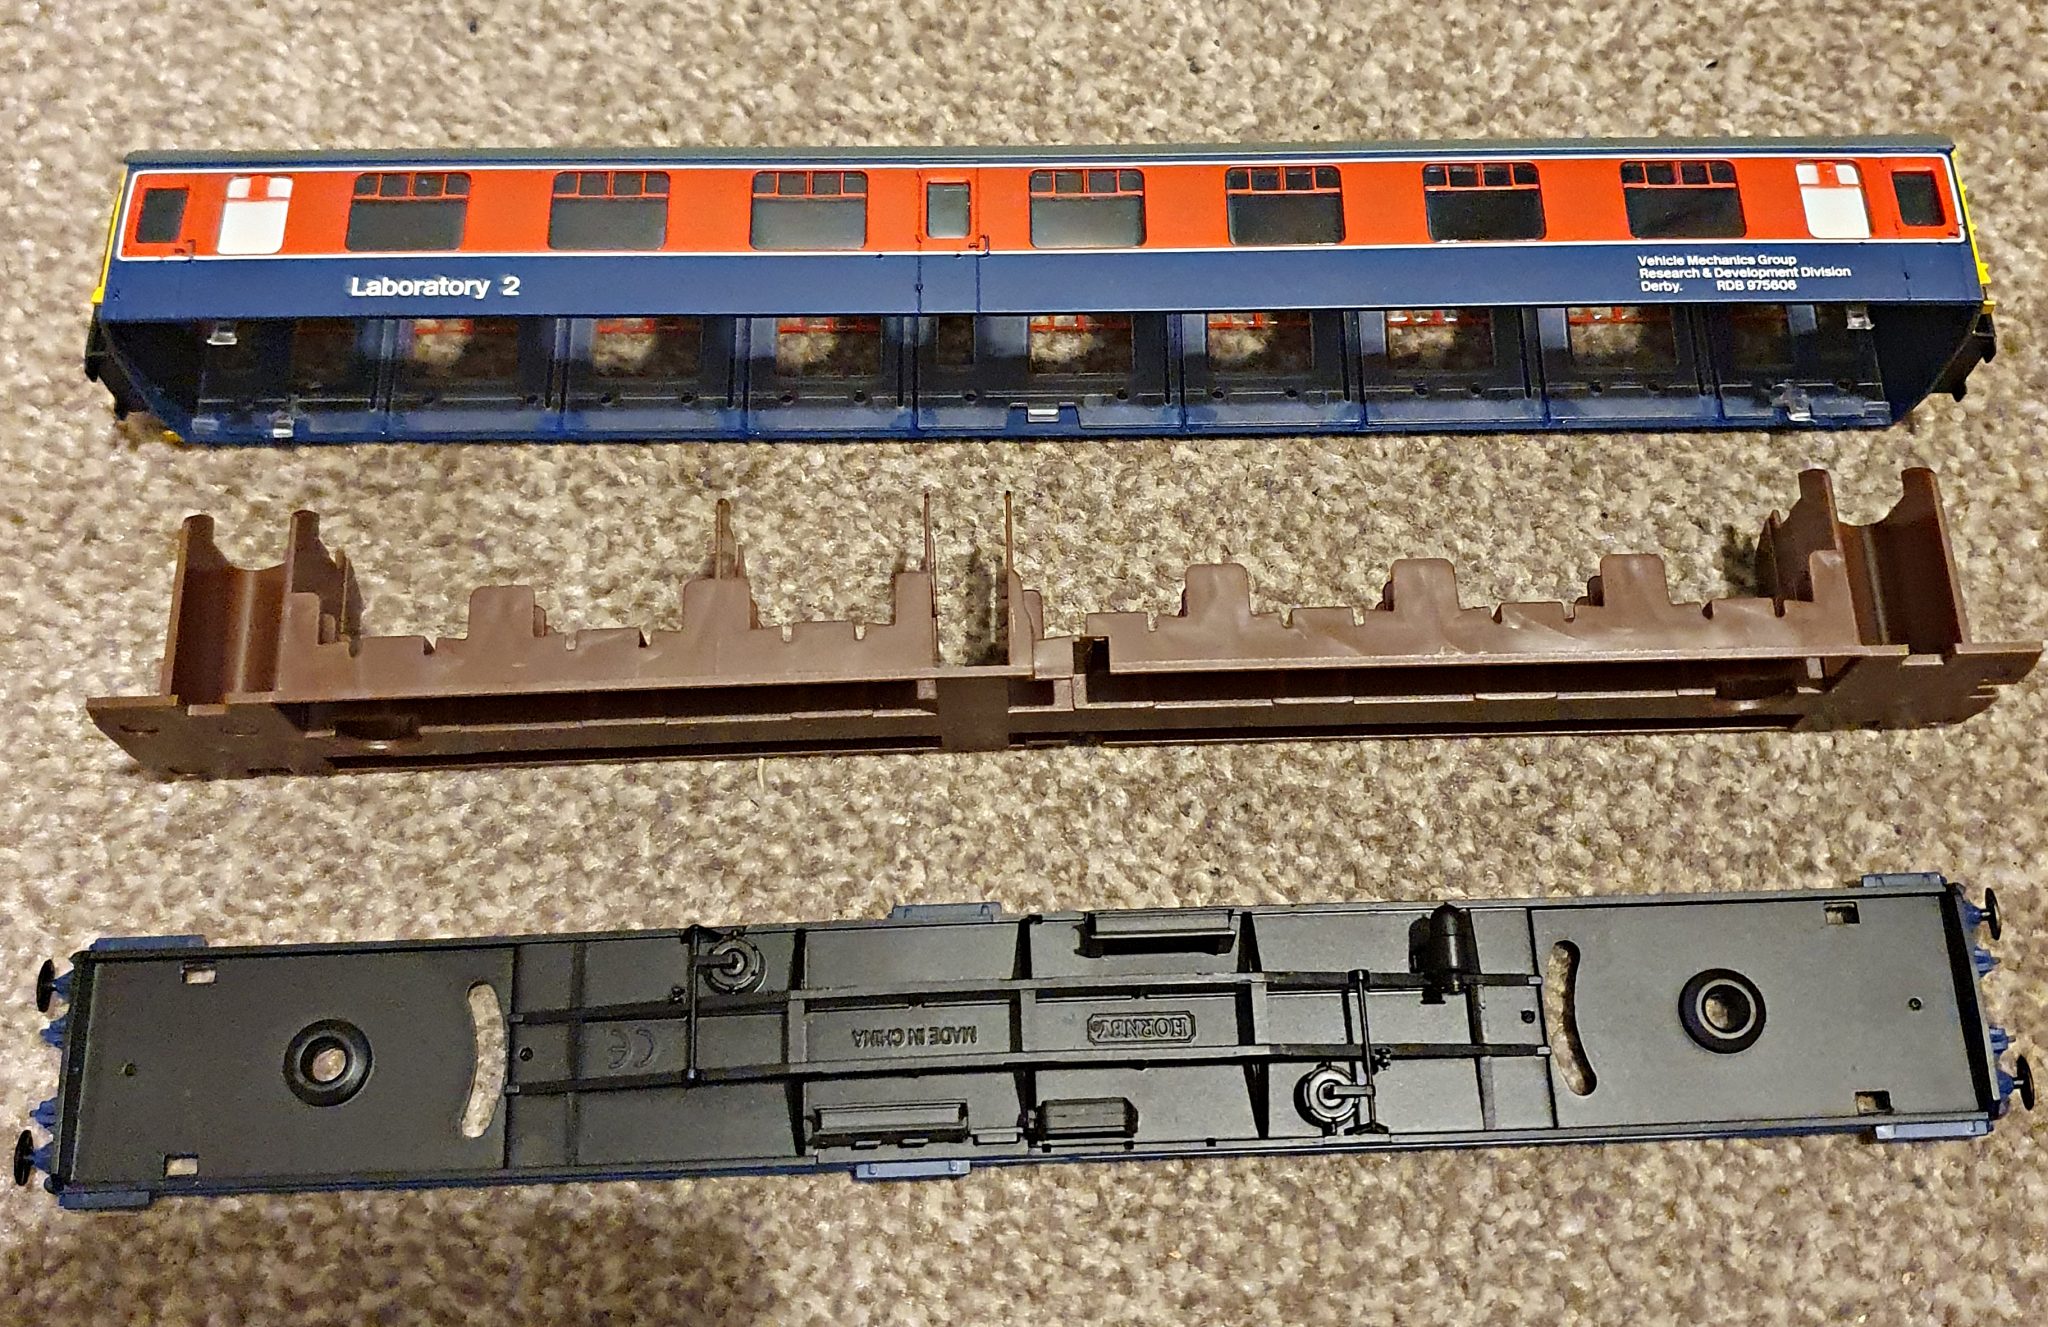
Spraying the interior and roof will help darken the rail blue colour but it won’t correct it completely so if you run it with a Bachmann RTC item you will still some difference. However, as no photographs show Lab 2 in any formations then it is ok to run it alone.
The coach roof was resprayed in a darker grey (humbrol matt tank grey), first carefully masking off the coach sides and ends. Two light coats will suffice.
Removal of the windows is nigh on impossible due to Hornby using some type of nuclear-proof glue and attempting to remove them is only going to end in tears, several broken windows and a ruined bodyshell. We therefore have to do it a slightly harder way and mask the windows from the inside.
Take great care here to ensure the windows are fully covered. You are painting over the blue plastic on the inside of the coach on both sides so it is recommended one side is done at a time to prevent mistakes. Also, you can spray downwards thus preventing any unwanted overspray on to the coach sides. I did mask the outside of the coach as I was spraying – just in case!

A nice couple of coats of a matt black spray (Halford car aerosol cans work fine) and leave to dry completely. Now is the time to detail the interior if required, however as I understand Lab 2 was fitted with some heavy control gear and didn’t carry passengers. I merely placed some plasticard blocks in several compartments to represent the control gear as to my knowledge no photograph exists of the interior… as yet!
If you are happy with the results then it is a simple case of re-assembling the body to the underframe and bogies and placing on the track … however ….
If you are like me (slightly RTC biased) then some extra detailing/ modification is required.
Firstly, removal of the applicable end steps (check photographs; the only two that seem to exist!, luckily one from each side!)
You should be able to remove the steps easily with a small craft knife/file as the plastic is quite soft. Careful not to damage the transfers on the end as the printing is nice and fine. Also the top flat ledges need to removed from above the gangway door. Once this is completed at both ends touch up the bare blue area you have made with a coat of matt white as a primer, followed by Phoenix Rail Yellow which is a pretty good match under natural light .
On one end the was some extra cabling, easily modelled with fine wire. The other end had a rectangular plate with a hollow round hole (presumably for equipment cables) and a red light. For this I used the head of a Peco track pin.


The extra bogie detail was added with plasticard strip and square channel, again referring to photographs that luckily show it quite well.

There is some debate as to what colour the bogies were, ranging from silvery grey to black. Therefore, until proven otherwise, I have gone for a base of matt black, then a coat of oily grey/steel dry brushed over the tops which really highlights the extra detail. Once it is lightly weathered, in the next batch I spray I’m sure the rail blue issue won’t cause much concern and blend into the other R.T.C stock quite nicely.

Hi, the outer dampers are 6mm in the length the inner ones are 4mm . All made from 2mm square plastruct section.
Thanks
Mark