
 Schools Tender Snowplough kit")
")
 Conflat D kit")


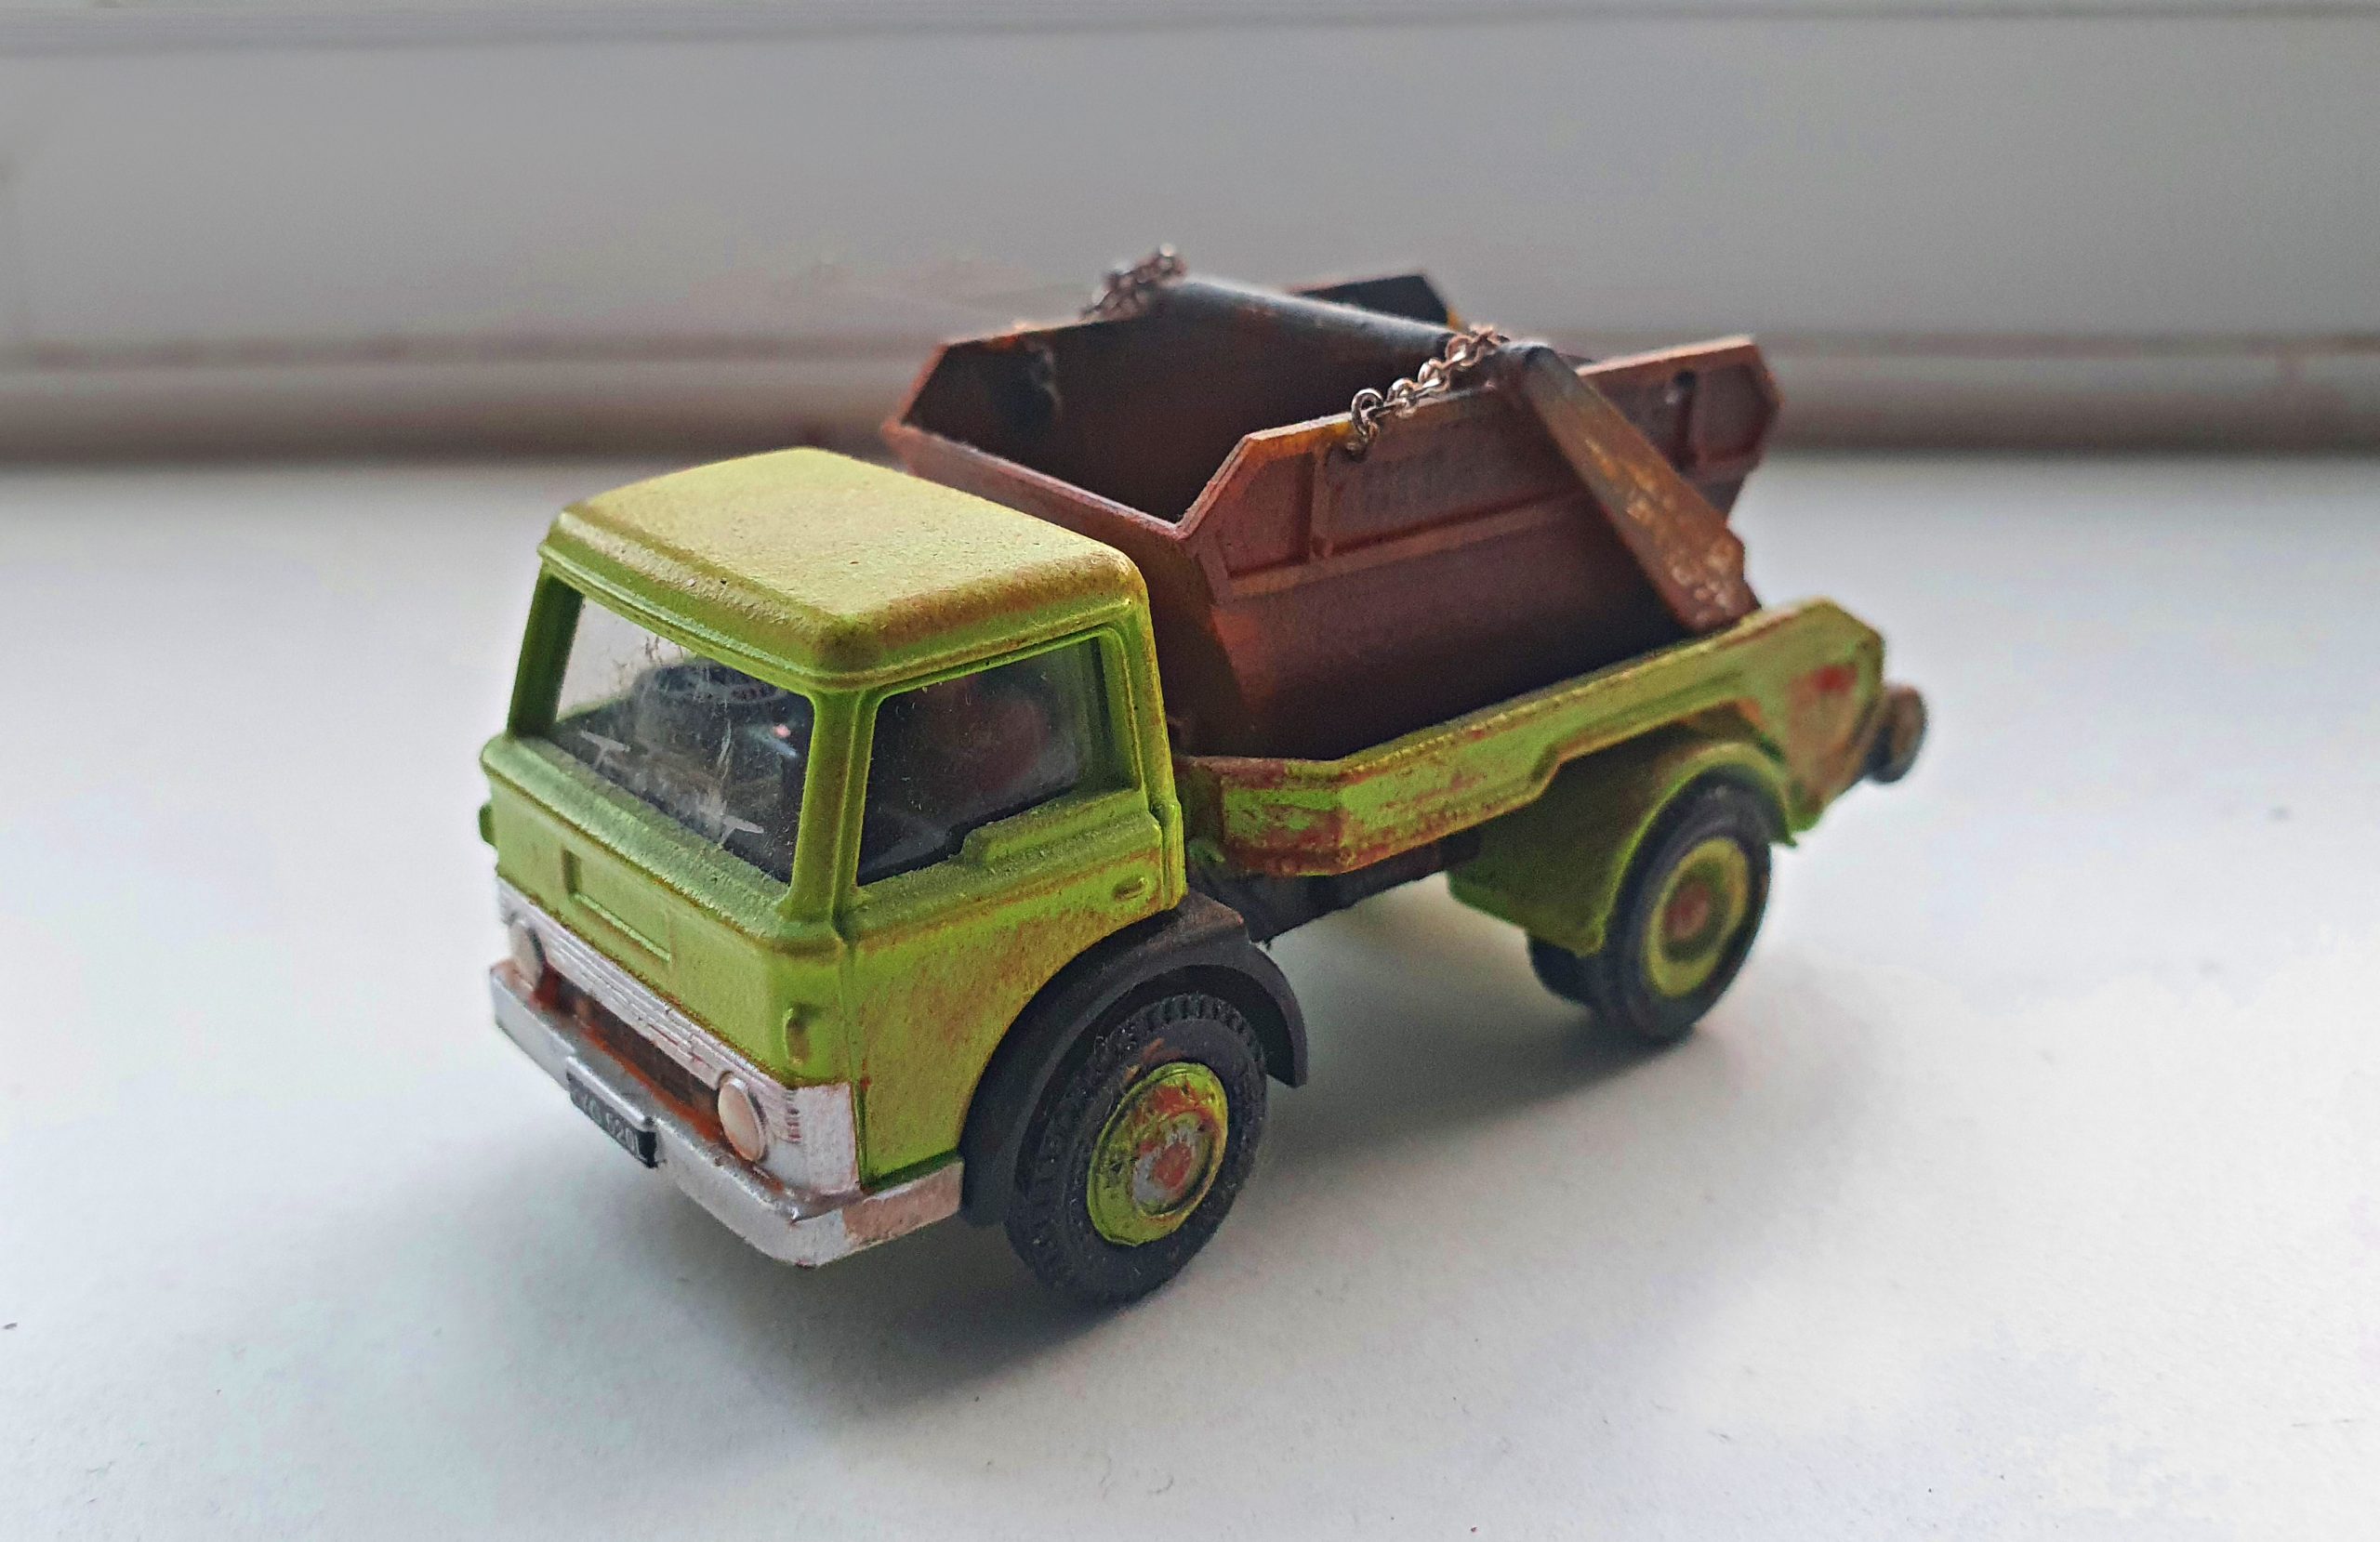
Despite the recent surge of some excellent 4mm scale commercial road vehicles, there is still one major omission despite its common presence over the last 50 years or so… the skip lorry!
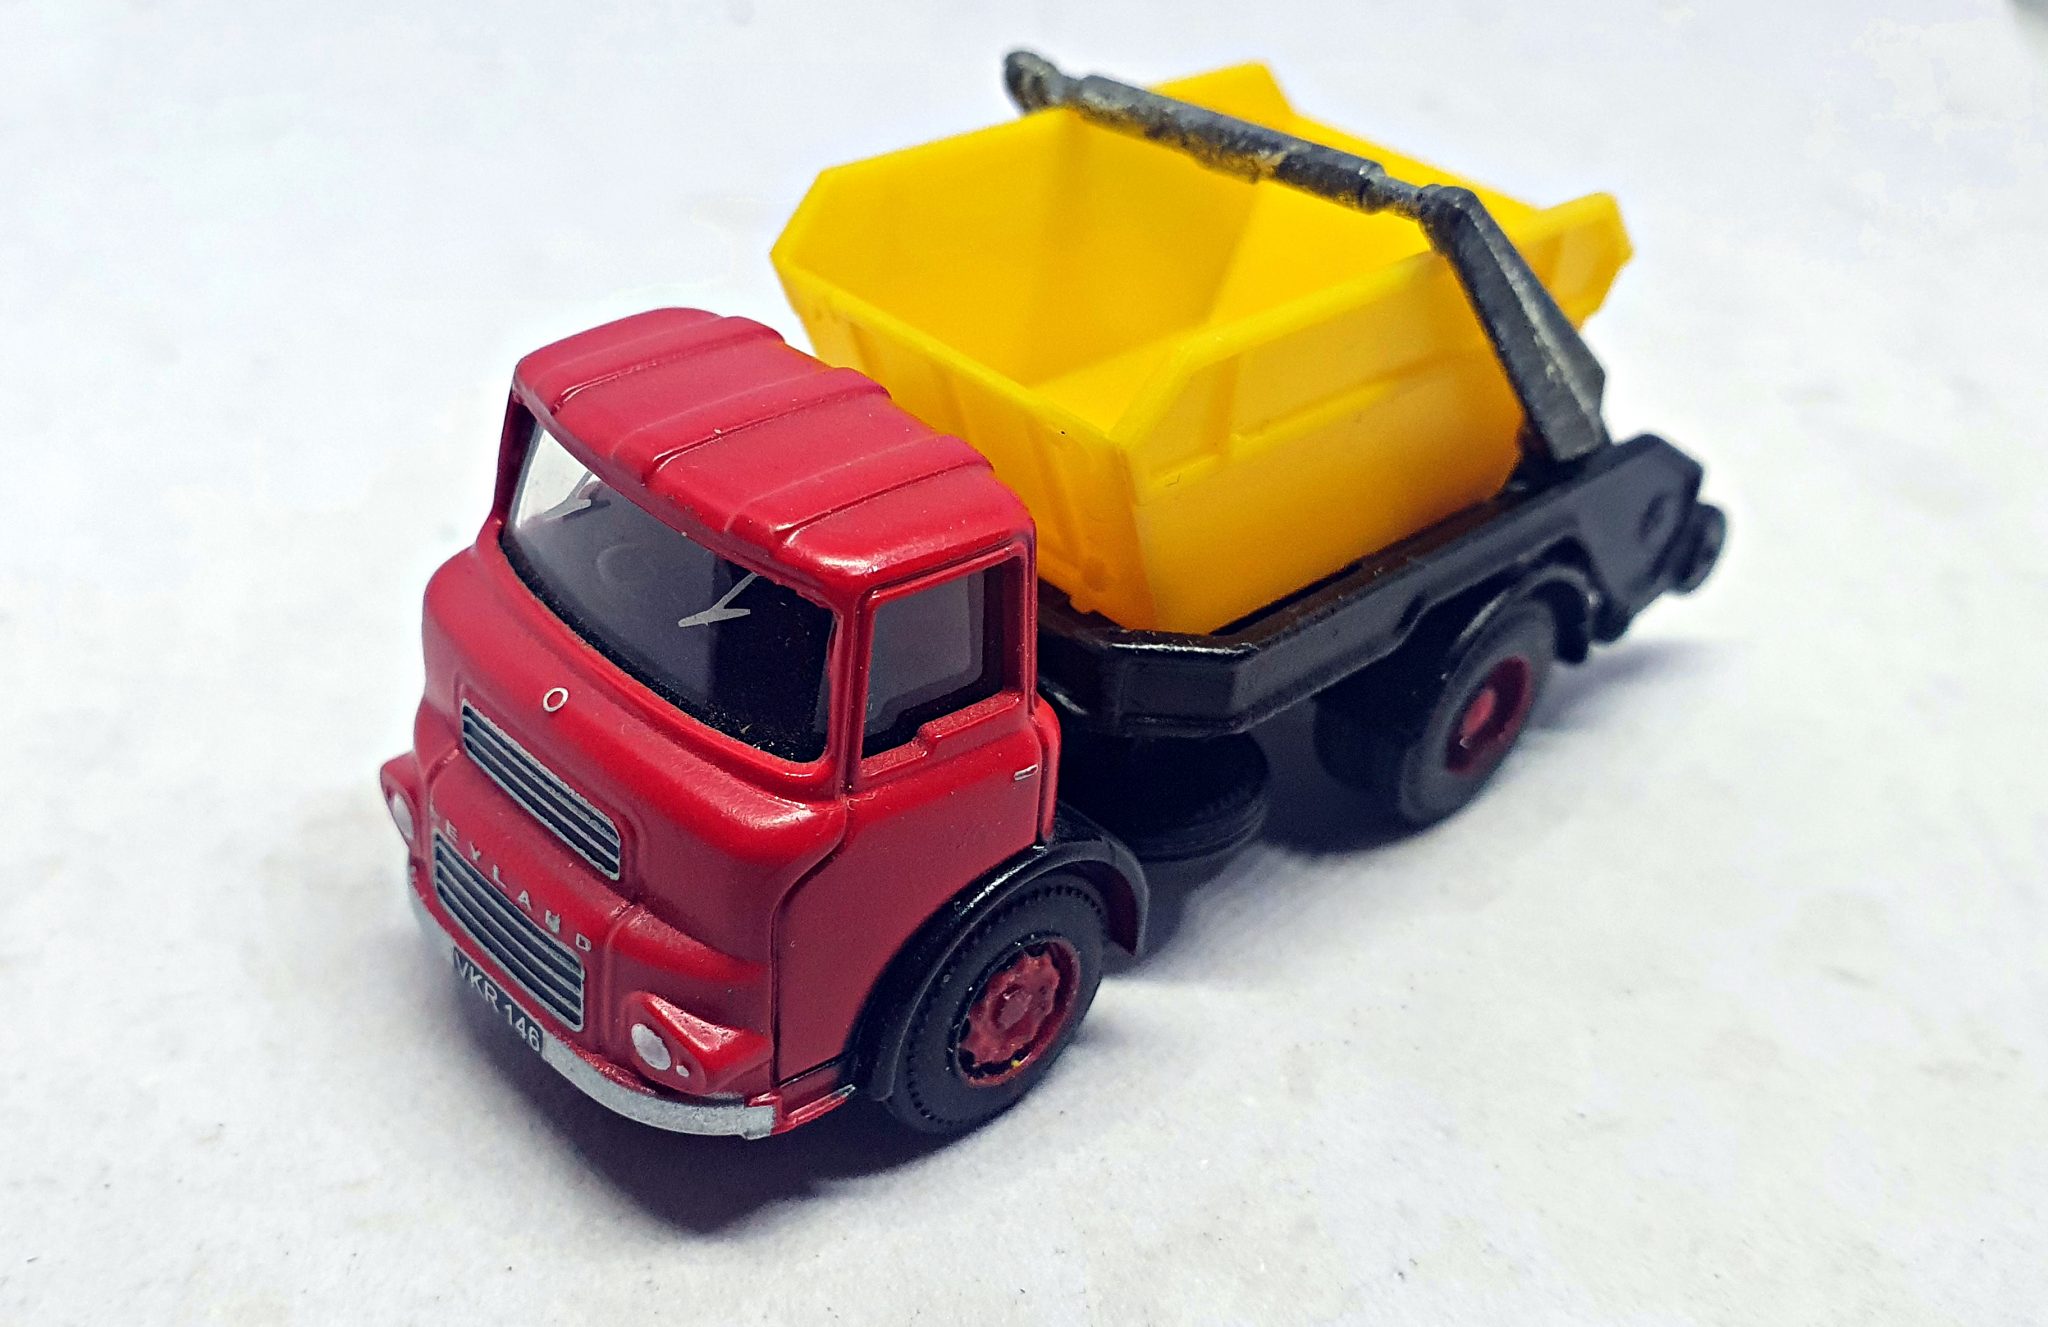
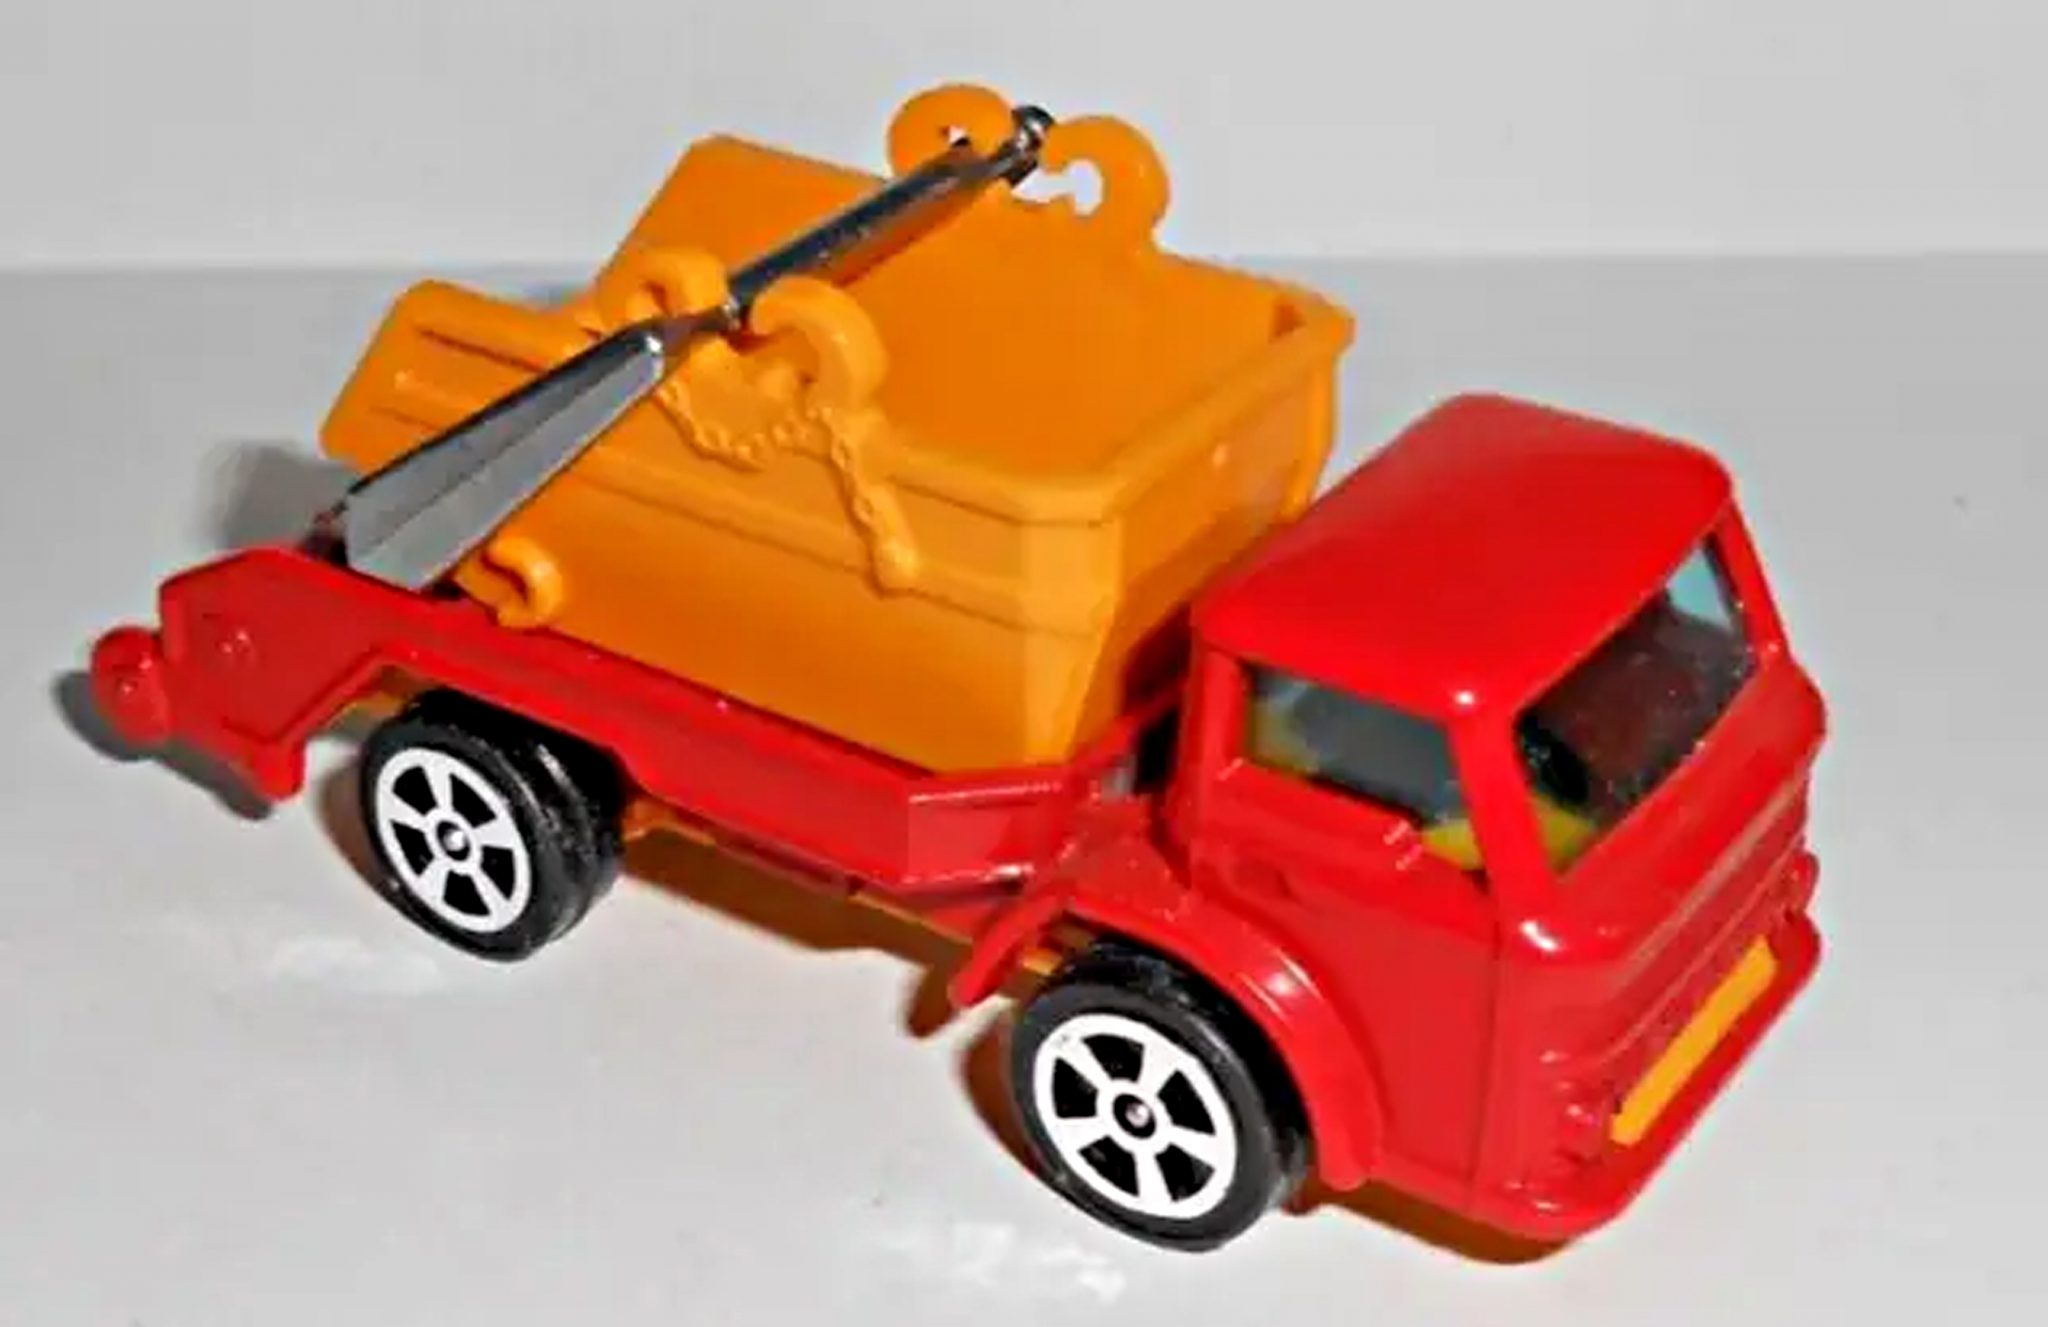
This project starts with either raiding your childhood toybox, attending a car boot sale or a local toyfair. You are in search of a Corgi Junior skip lorry (yellow plastic skip not important, we will cover that later). They came in a red colour with various ‘whizzwheel’ arrangements and an underscale Ford ‘D’ cab. Wheels, cab and glazing are not important, just the base, rear, and skip lifting bar. You will also need a Base Toys or EFE model of your choice for the new chassis and cab.
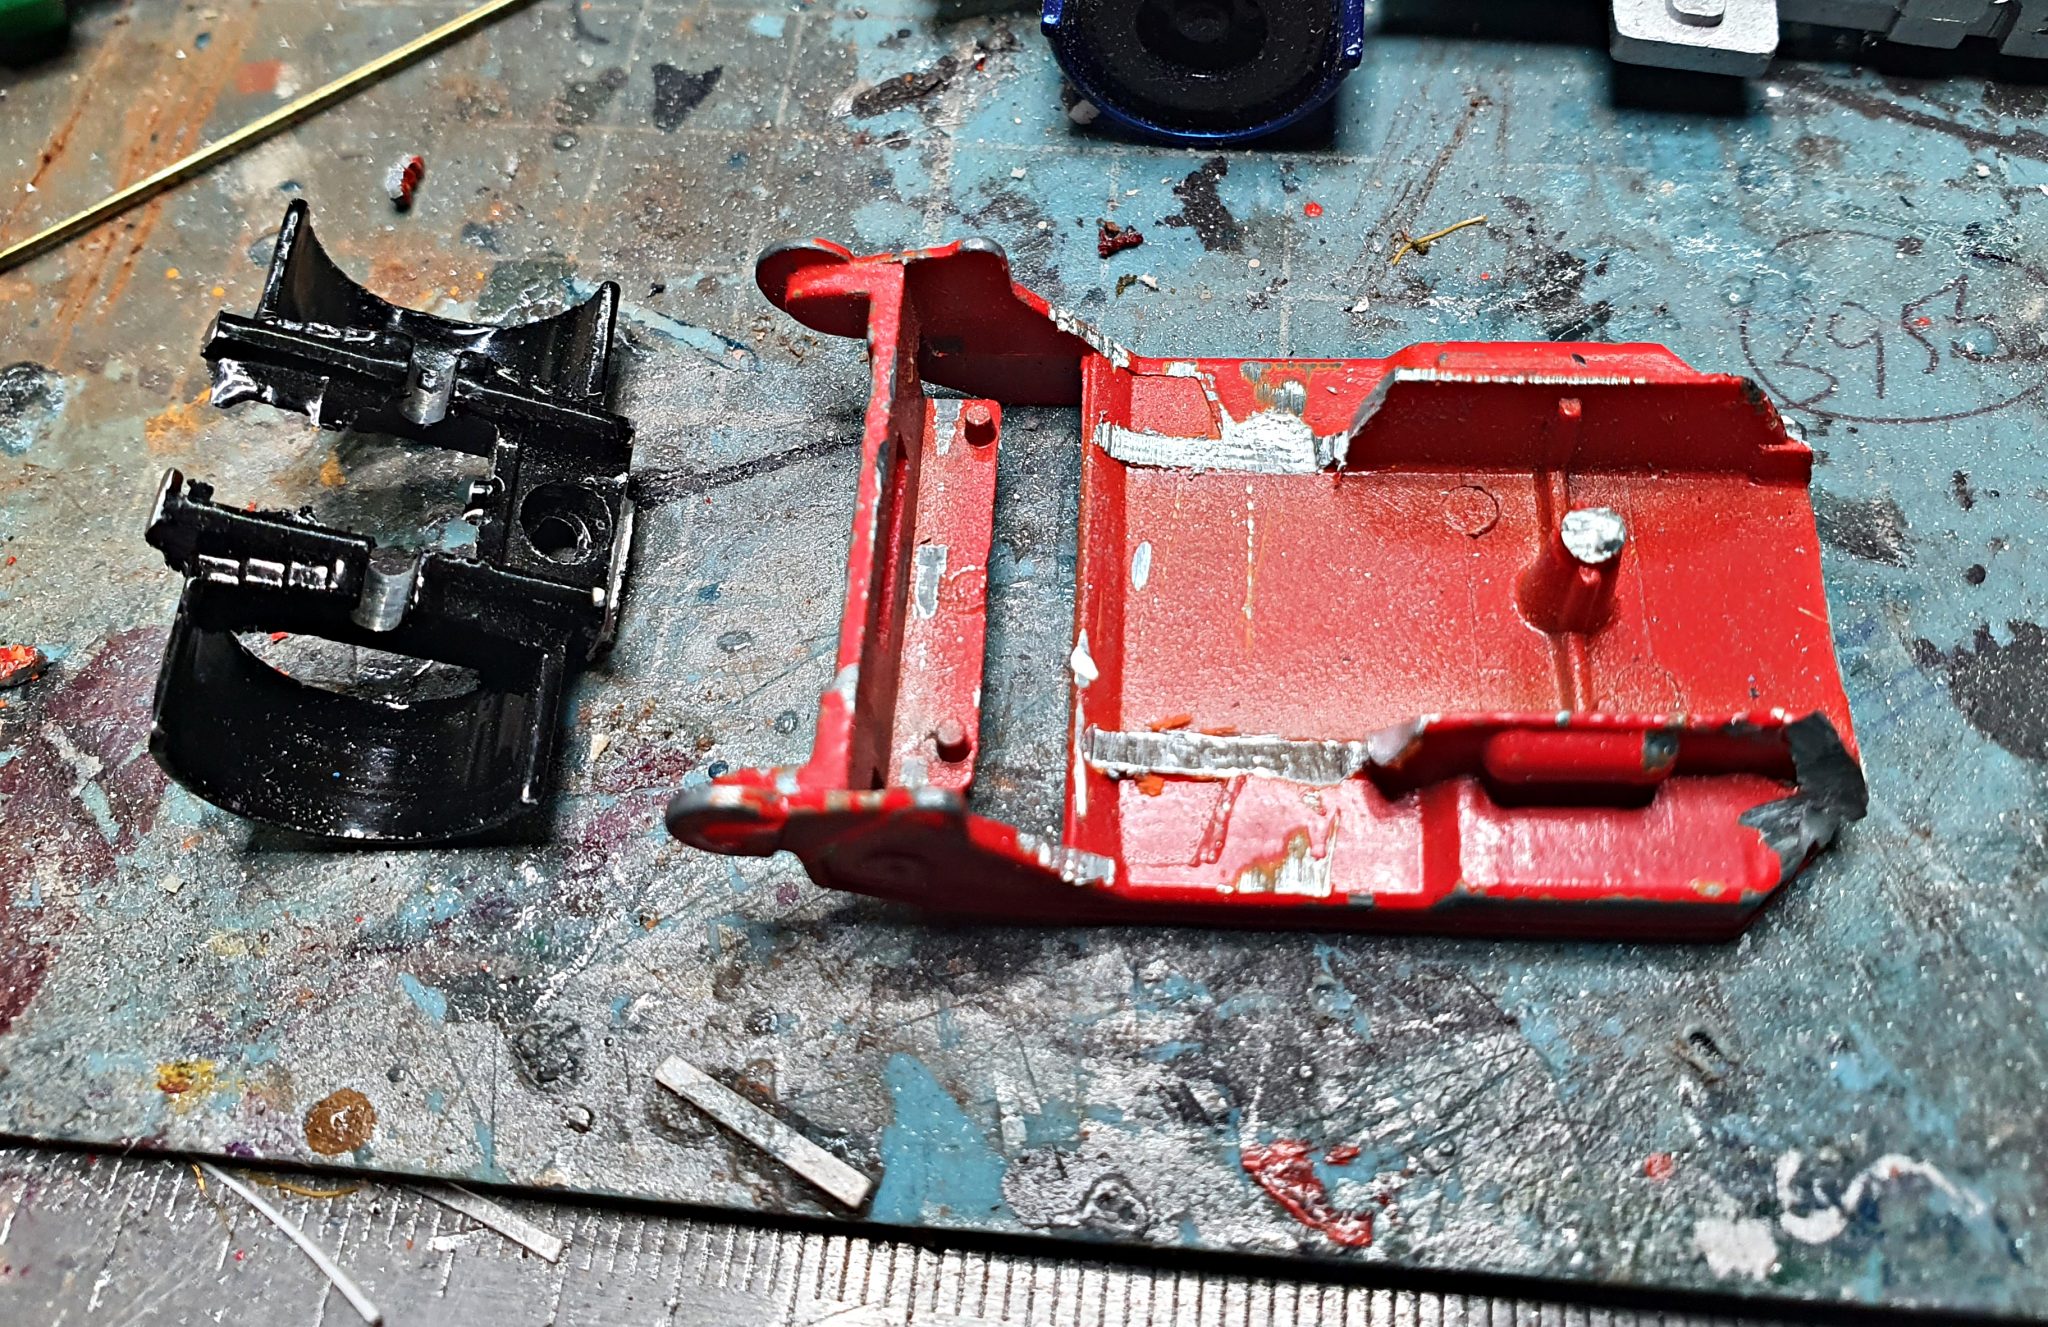
Start by removing the chassis base by drilling out the rivets holding it in. This will release the silver skip holder arm, put this to one side as it will be refitted later. The only part of the plastic base you need to keep is the little slot that goes into the back of the chassis casting, and it needs to be yellow!
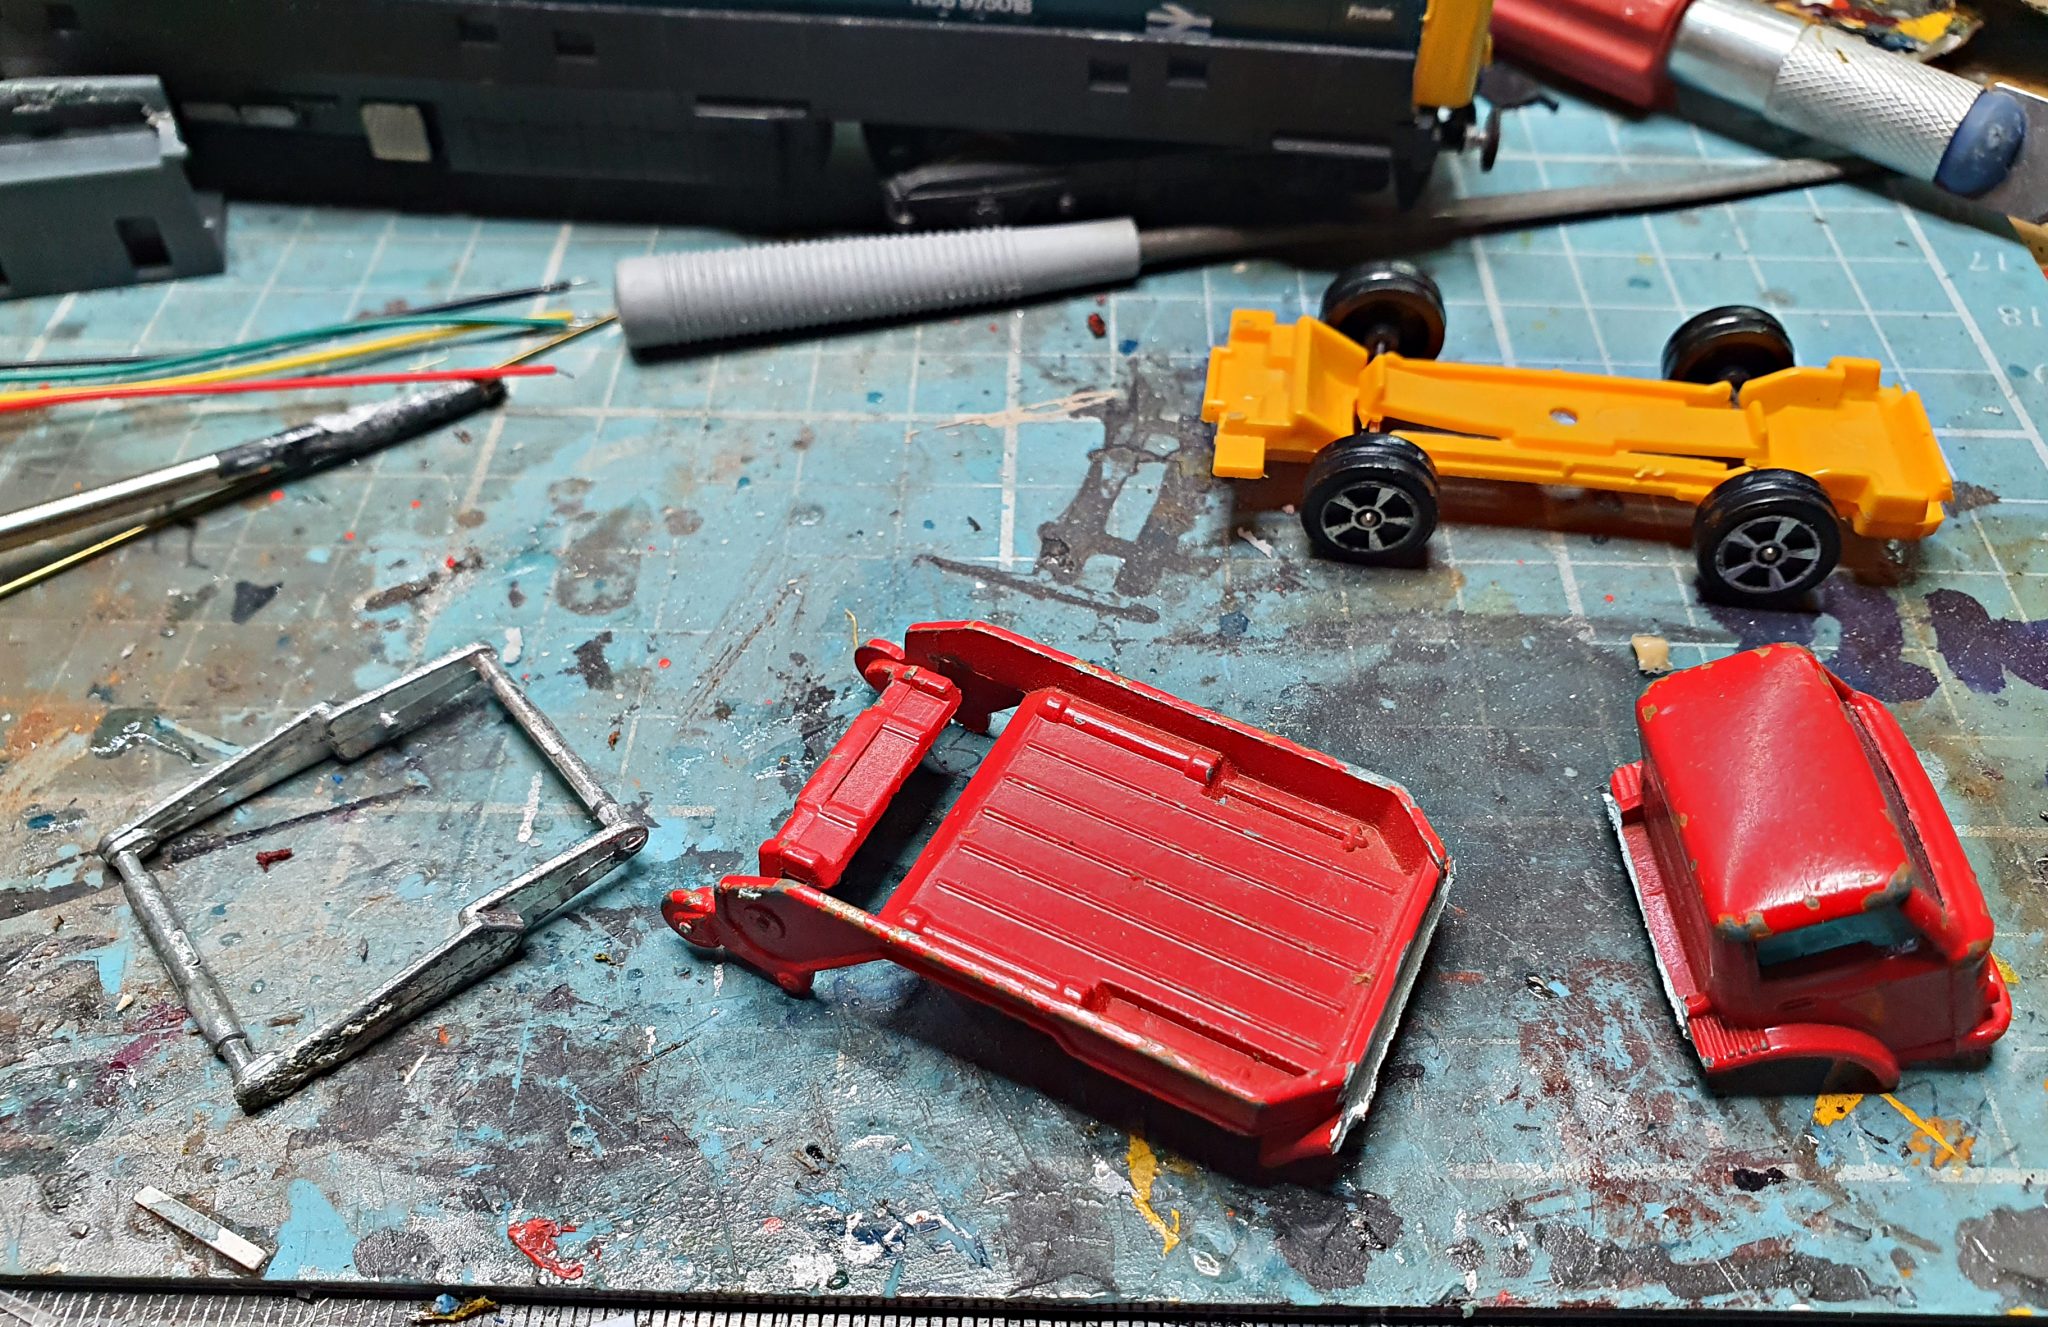
Remove the wheels and discard or repair another corgi junior car with them like I did! We now turn to the body casting as we need to separate the cab and the rear deck. With a junior hacksaw or carborundum cutting disc (remember it gets hot!) cut off the cab unit just behind the rear of it, and discard it as it won’t be needed.
Now you should have a rear flat chassis piece. Surprisingly for a 1970’s diecast toy it is remarkably near to 4mm scale. At this point it will need to repainted, Loose, flaky paint will need to removed or dip in a paint stripper of your choice to remove paint completely (see our paint stripping guide).
Once stripped, grey or red primer works well, followed by a few light coats of matt or gloss black depending on your required level of finish. You can also paint in the colour of your choice to match the cab, but after doing several of these now for myself and others, the black chassis seems to work the best.
With the paint drying we turn our attention to the cab. I have used various Base Toys cabs and they will all fit, the Leyland or Ford cabs really giving it that 1970/80’s feel.
I don’t recommend repainting the cabs, too much fine detail transfer/detailing work will be lost, so choose a colour of your choice. However, removing the base enables you to fit a driver in the seat and apply matt varnish to the cab unit.
Now, the chassis, this being the most difficult part of the conversion to get right. With the Base Toys or EFE chassis you need to cut a rear axle/mudguard unit to fit at the back of the rear deck. You will need to file/grind away the rivet bumps to get a flush fit. Spray to the same colour of the chassis. Refit the metal, silver coloured skip arm, and the little yellow plastic piece that fits into the slot (now you can see being yellow it looks like a rear registration plate!), it also holds the skip arm in place. Then, superglue the wheel arch section to the underside of the base placing as far back to the rear of the chassis as possible and refit the wheels/ tyres. Ensure it sits square and level at this point.
The front wheel/ chassis assemble is next. Remove the wheels from the EFE / Base Toys chassis to make cutting easier (they should just pull off) and cut a piece from the chassis front between 33-35mm long depending on your cab of choice. Refit to the cab unit and replace the wheels. Offer up the chassis piece and straight away you will see a height difference! This is normal and no reason to think you have done anything wrong. The height difference to balance the front to the back chassis parts is simply corrected by shims/wedges of thick plasticard until you have a level chassis. Glue the plastic shims in place, gluing to one side then gluing the two halves together. Fitting a spare wheel on one side helps disguise this step but once painted it doesn’t become noticeable.


The yellow plastic skip I’ve used is a Merit/Peco item and fits perfectly, although I have recently bought some 3D resin printed ones that work out cheaper. These need a little bit of careful filing to get a snug fit. Of note is that there are two sizes of Merit/Peco skip – both will fit, one is just a little longer. Extra detailing of the skip can be done by fitting fine chain over the tops and filling some with 4mm scale household rubbish is essential!
Overall, it should take no more that a couple of night’s modelling time resulting in something individual to you.