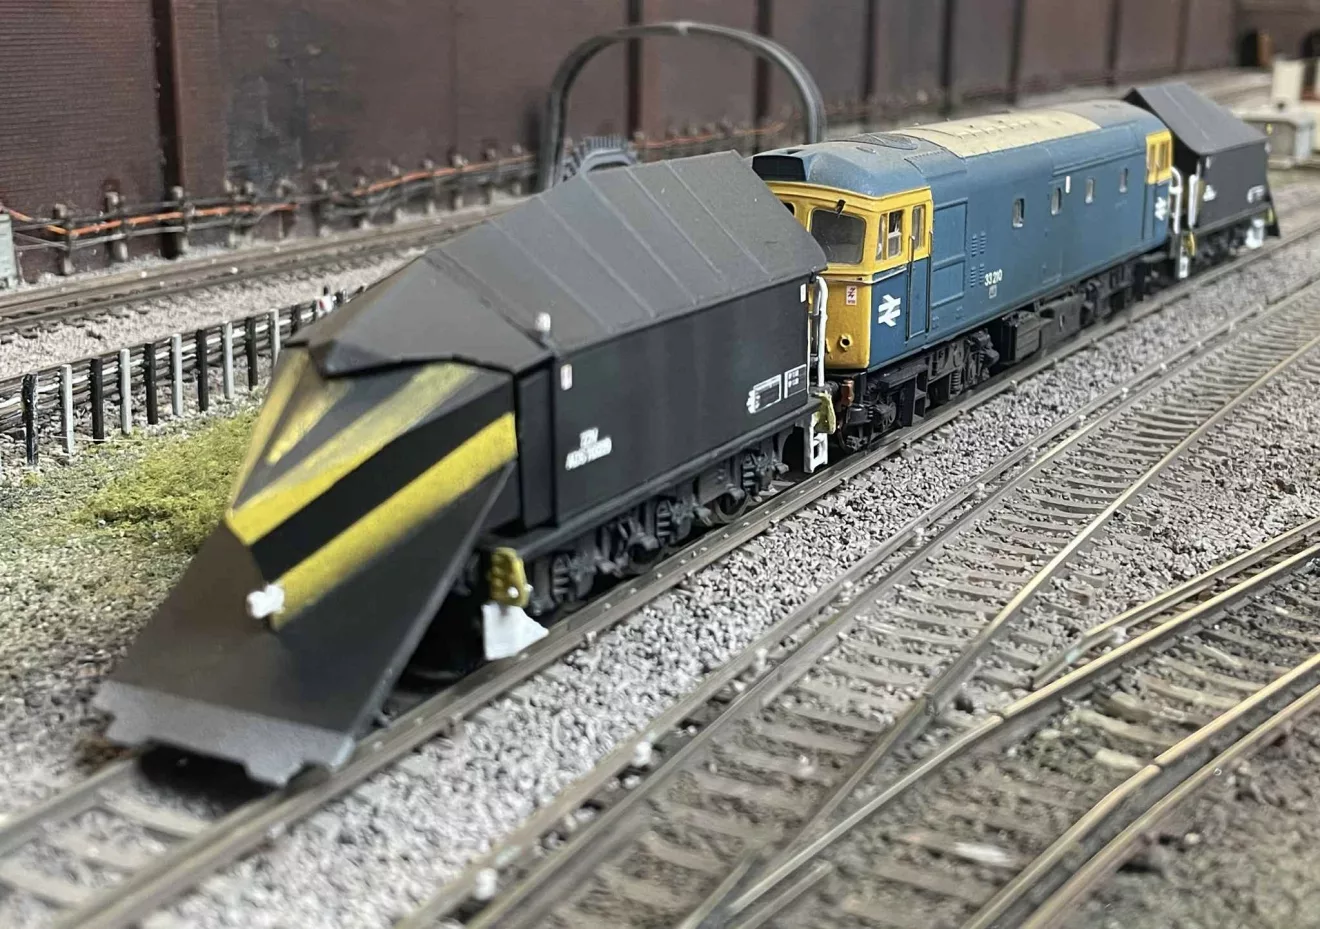
Schools Tender Snowplough kit")
")
 Conflat D kit")


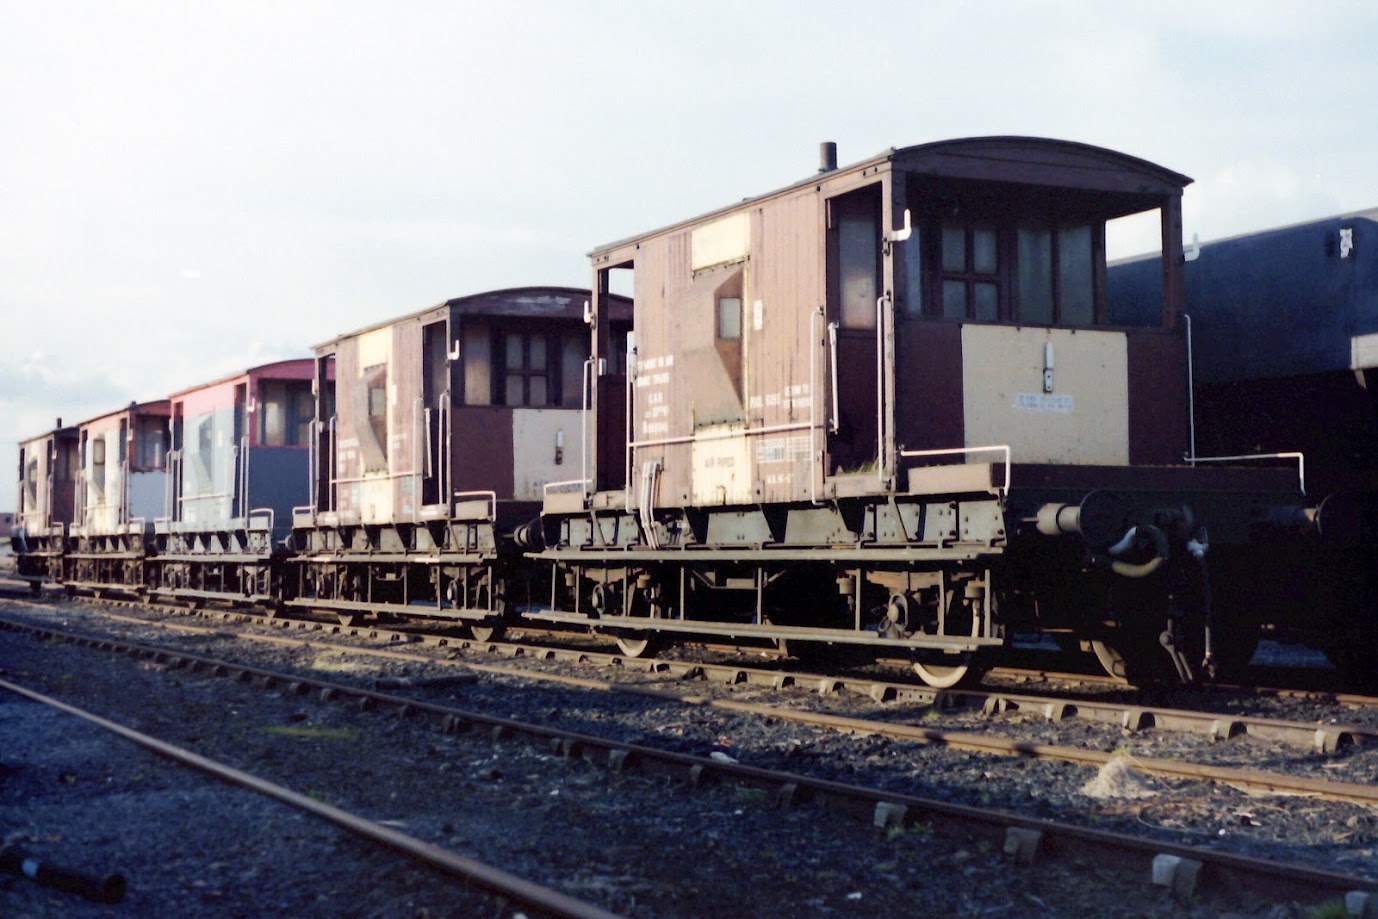
Although mostly associated with the steam era, Brakevans were still in use and a common site on our railways well into the early 1990’s.
I have vivid memories from my early train spotting days, standing on the footbridge at my local spotting haunt watching train after train of mostly Class 20 hauled unfitted coal trains. These were made up of venerable 16ton mineral wagons and as they rumbled beneath, a Guards brakevan bringing up the rear, it’s longer wheelbase giving an out of rhythm beat on the jointed track, smoke drifting lazily out of the stovepipe chimney, and the silouhette of the Guard inside adding an air of mystery.
Post 1984, following the Miners strike and subsequent reduction in demand for coal traffic, these trains became fewer and fewer, with block trains of HAA Merry Go Round wagons becoming the norm.
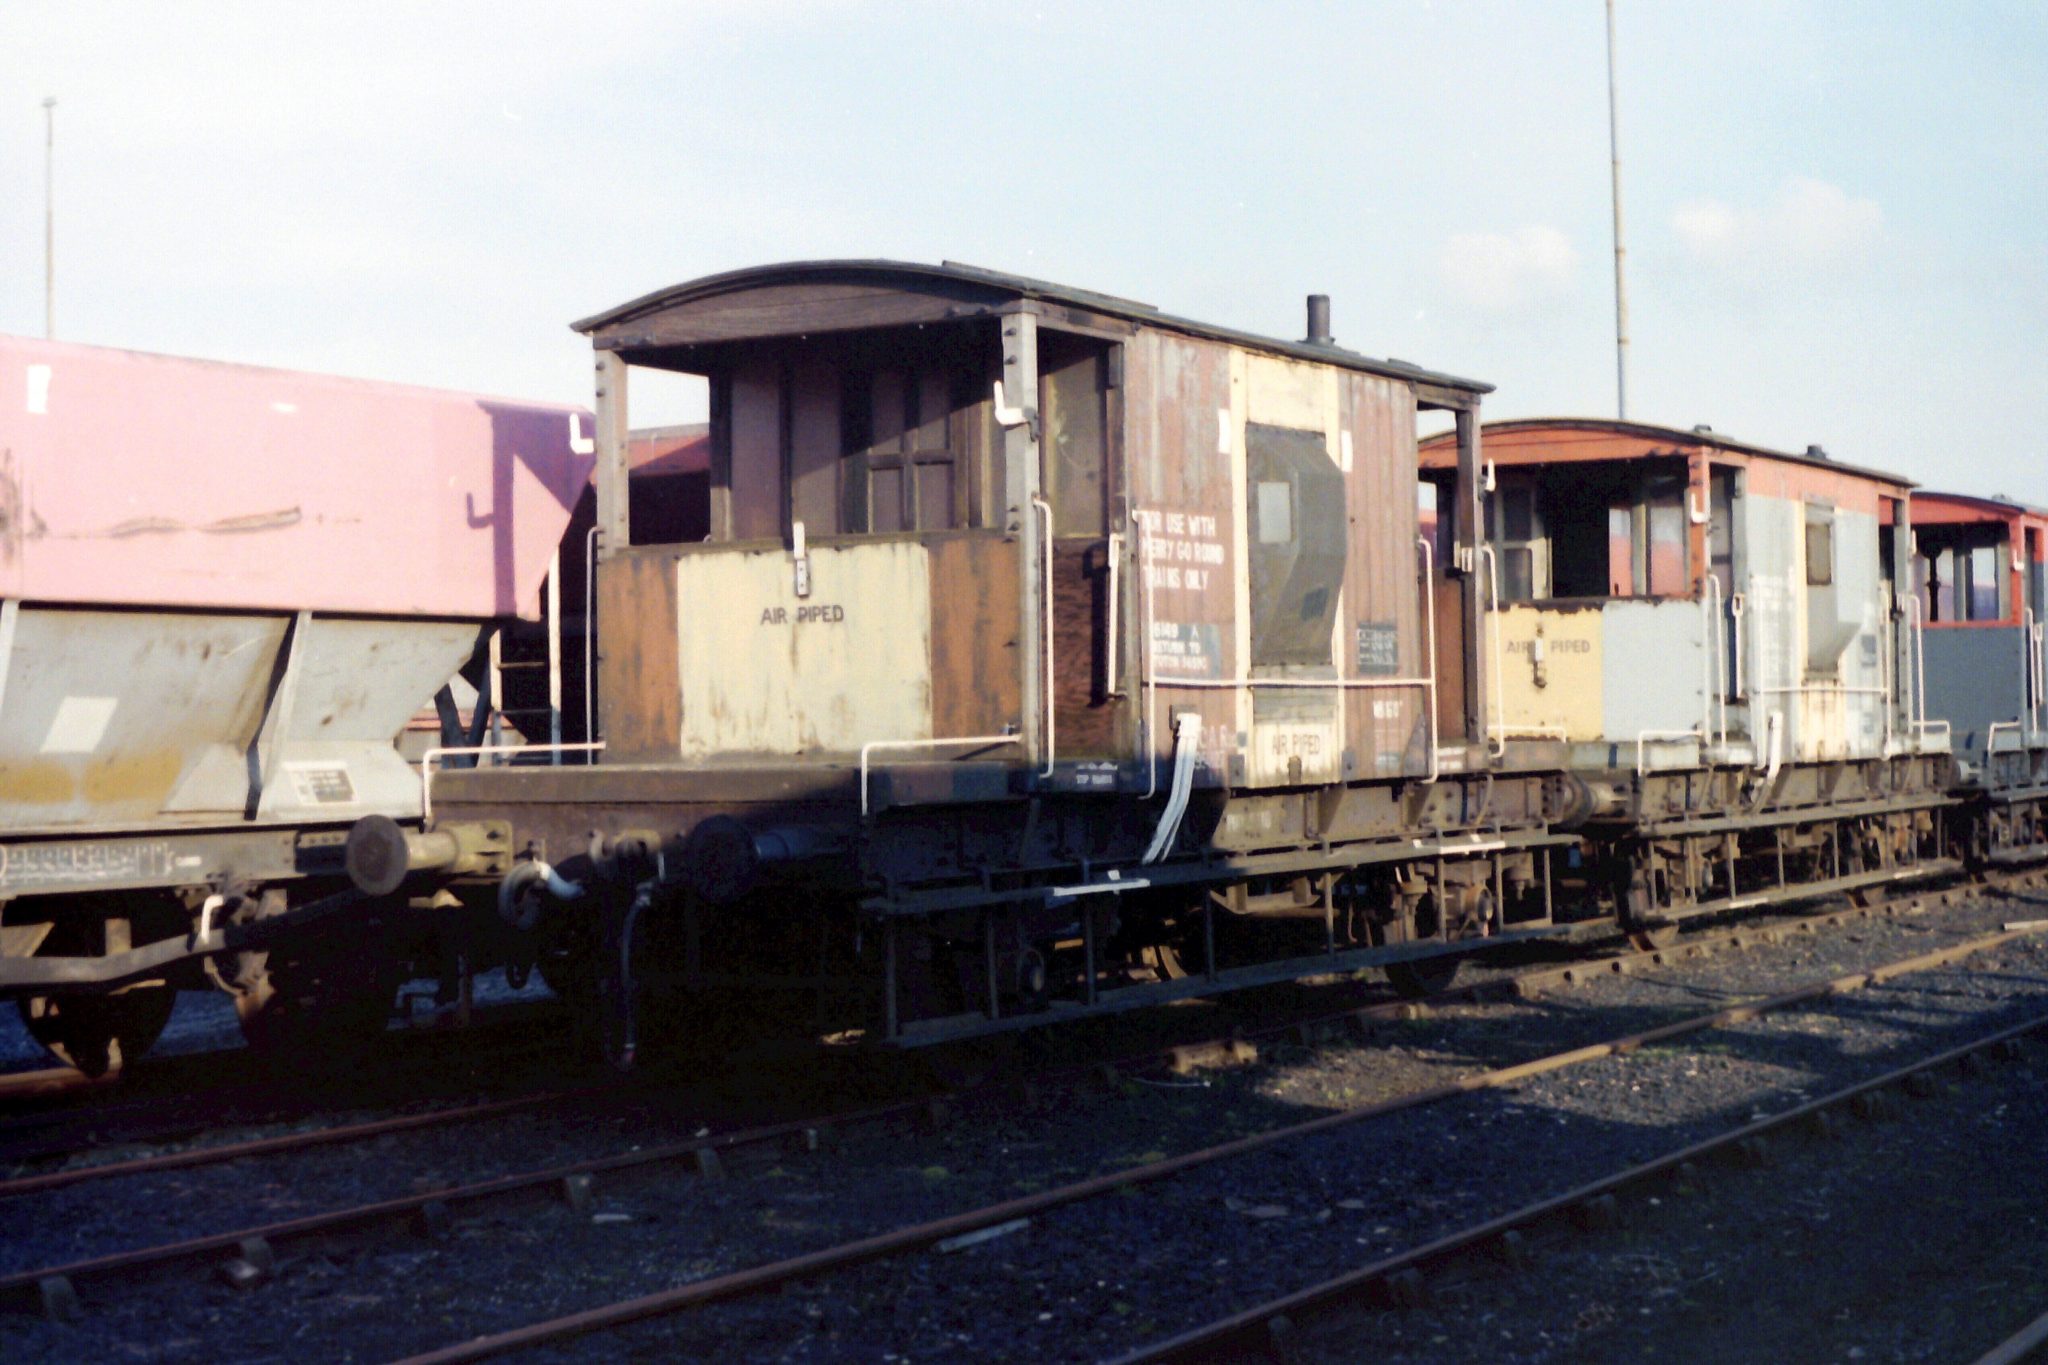
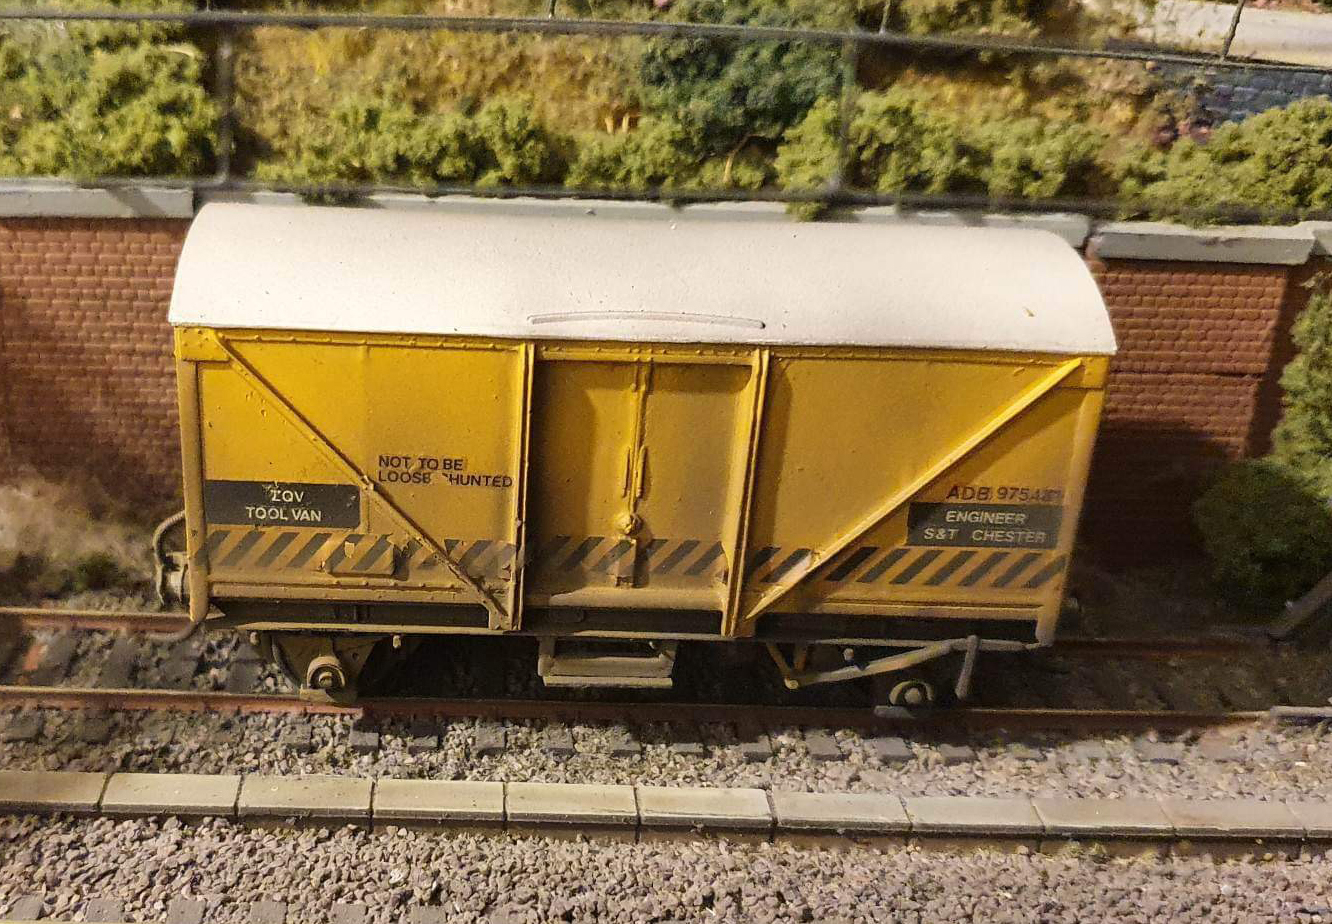
Up until the early 1990s the Civil Engineers department also operated a fleet of very dilapidated wagons dating from the steam age. These trains consisted mostly of unfitted (un-braked) vehicles, and required the use of a brakevan at the rear to assist the locomotive in braking the train. These were some of the last trains that could be seen with a Guards brakevan with any regularity across the railway network.
Brakevans could also be utilized when special traffic was being conveyed.
Purpose
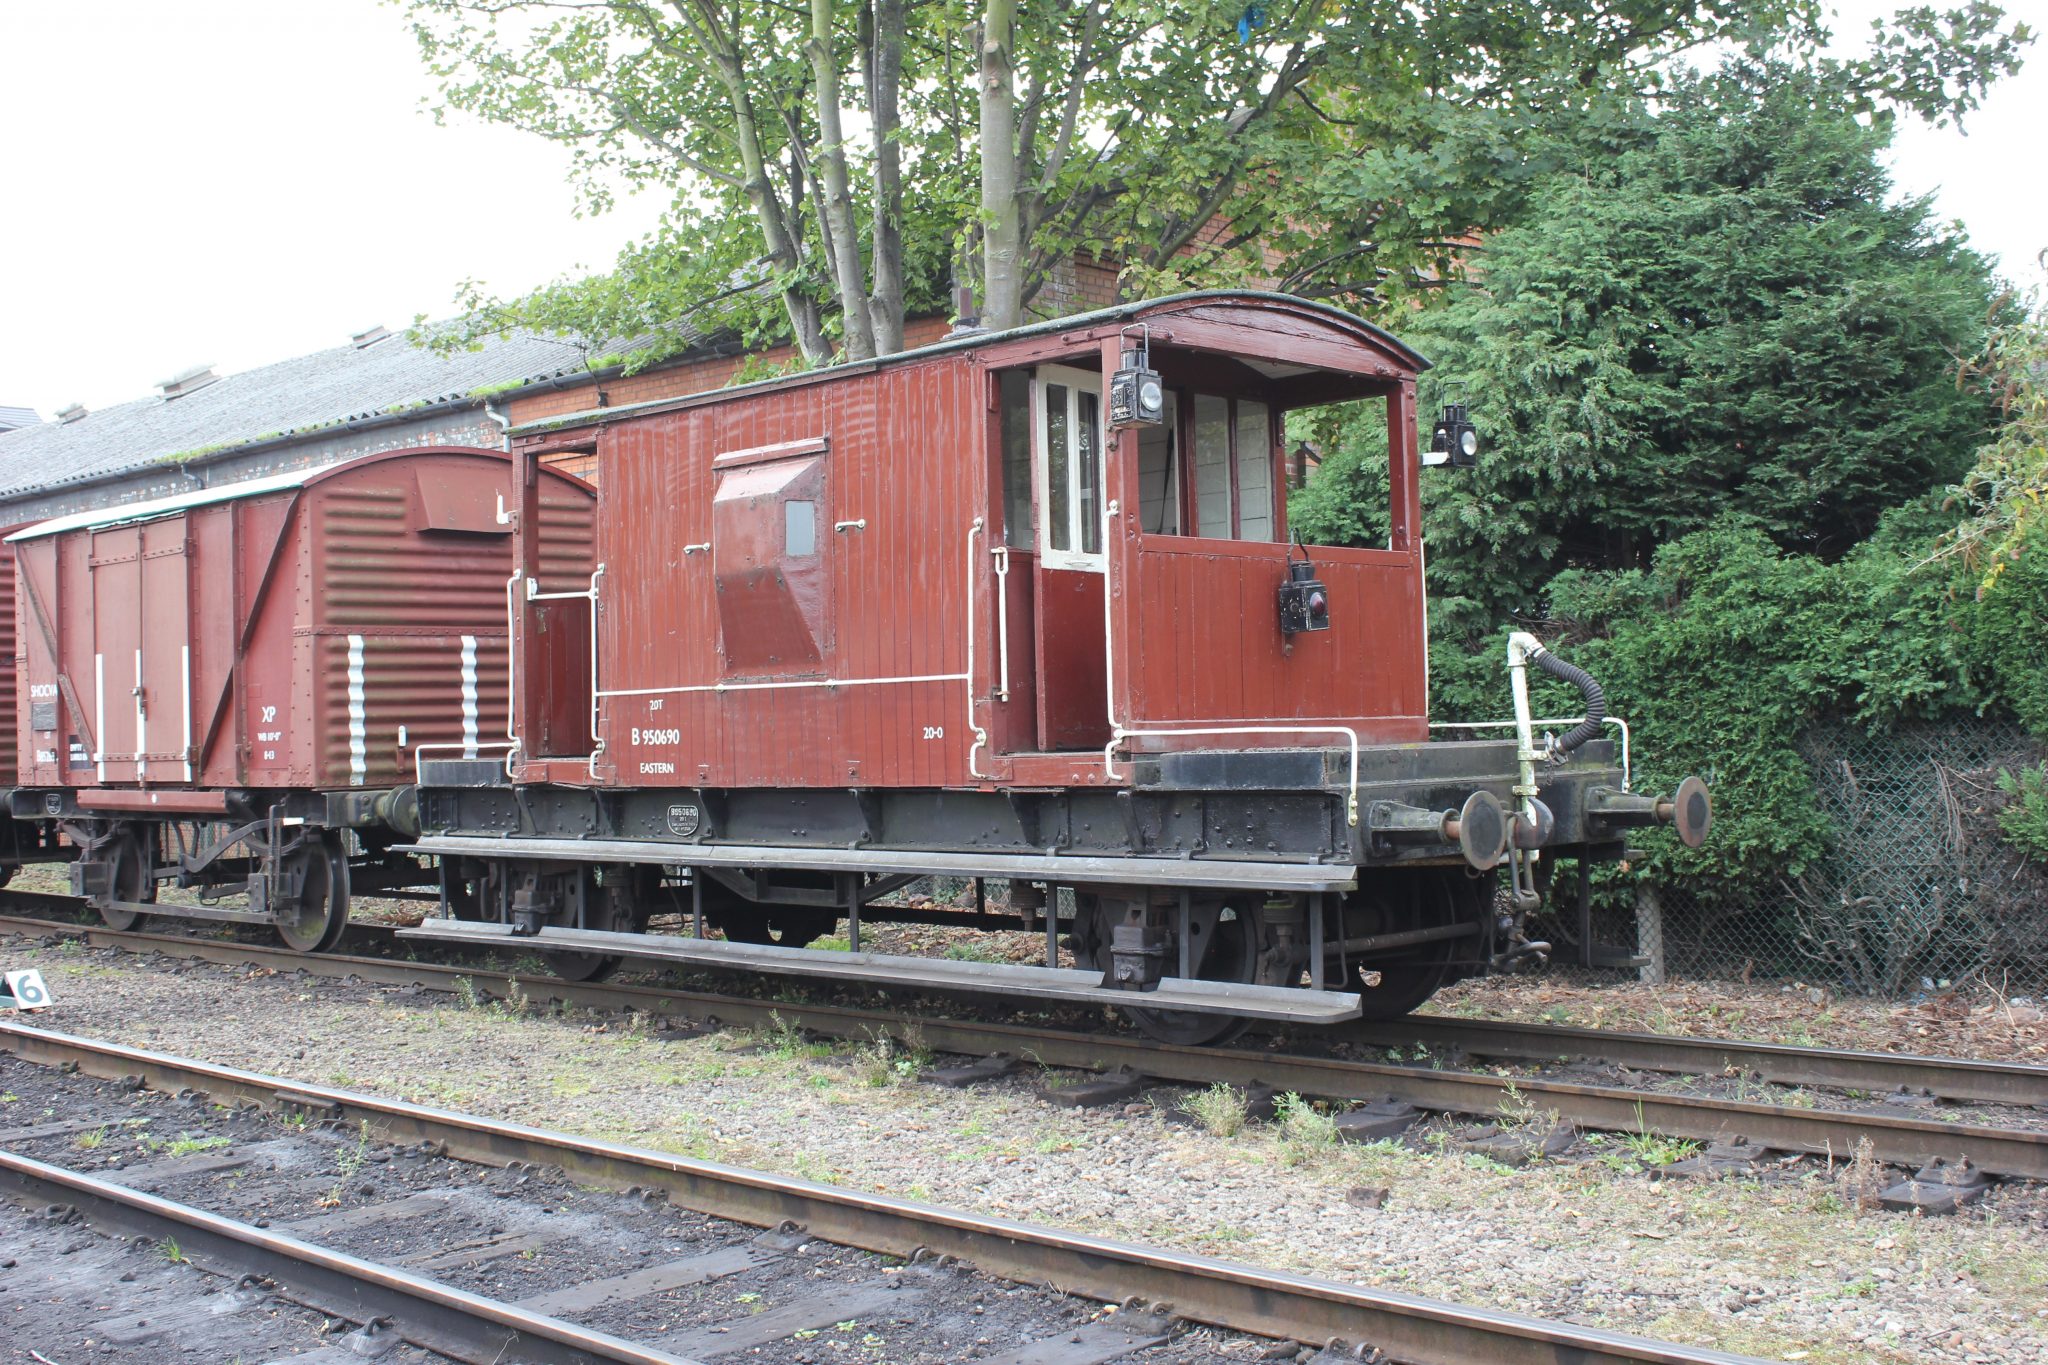
The purpose of the Guards brakevan has changed little over years. Essentially this is the place where the Guard would travel, whether this be on a Passenger working, or in the case of this article; the rear of a freight train.
Their duties as the person in charge of the train would be to observe the train whilst in transit, looking for anything that may put the safety of the train in danger e.g. a hot axlebox, a dragging handbrake, or a shifted load etc. whilst also keeping a log of the trains progress.
The train could be observed from the outside verandah of the brakevan, or seated inside from duckets built into the sides of the van.
Their duties also required them to assist the Driver in braking the train. During the steam era and overlapping into the first decade of the diesel era, the majority of goods trains were still ‘unfitted’ i.e. the wagons weren’t fitted with brakes that could be operated by the Driver from the locomotive.
In order to do this, the Guard would apply the handbrake in the brakevan, using his route knowledge and skill to determine when this would be necessary and how much brakeforce would be required.
Brakevan Equipment
The fixed equipment inside a brakevan consisted of a handbrake wheel, a brake pressure gauge and valve, a writing desk, coal stove and depending on the type of van; a number of horizontal lockers (which also doubled up as a bench to sit or sleep on).
Equipment carried on the van consisted of, a tail lamp, a pair of side lamps, two track circuit operating clips, a shunting pole and a brakestick (used to manually apply wagon handbrakes).
Looking back now, the thought of somebody travelling at the rear of a train at upto 60 mph in a wooden bodied, four wheeled box, with no lighting and a coal fired stove for heating would today be seen as a health and safety nightmare.
There were also no toilet facilities on board, a desperate Guard would have to make do with a few sheets of newspaper, the resultant ‘Guards parcel’ would be despatched over the side of the verandah, after first making sure they were not passing over a bridge, near platelayers or heaven forbid, a station platform!
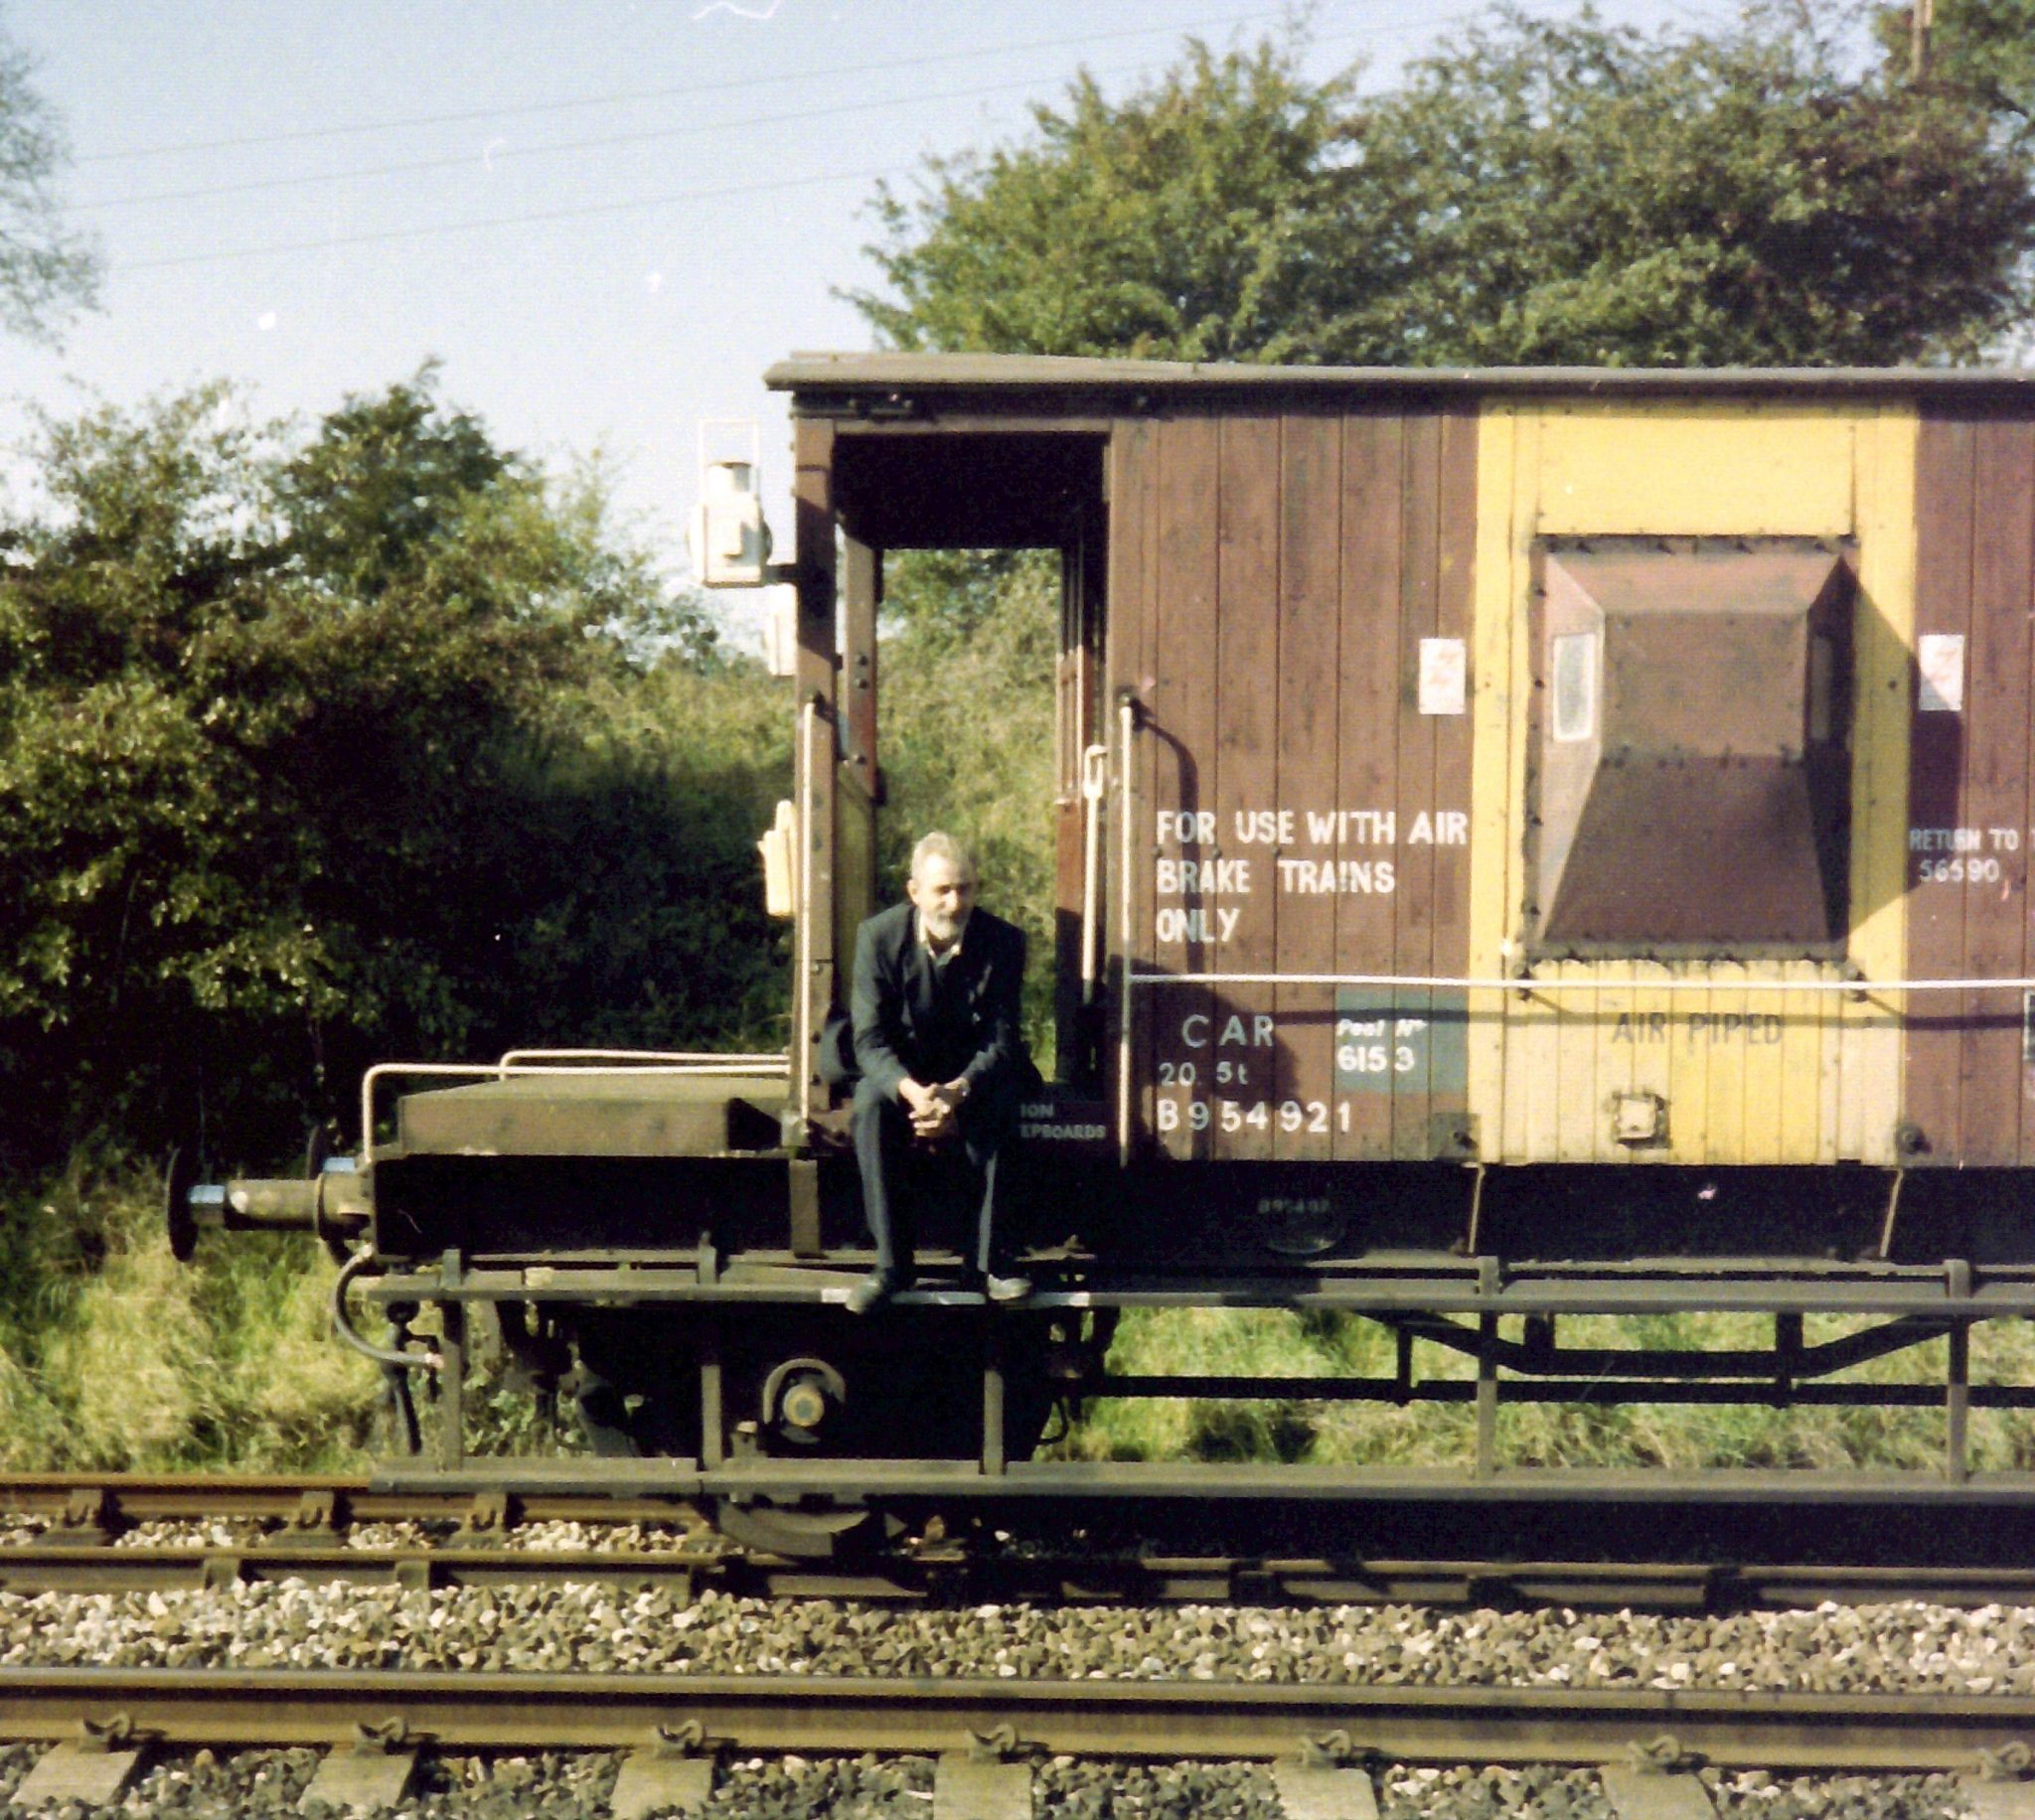
As mentioned earlier, these vans found a wider use following the demise of traditional unfitted traffic, as evidenced by an extract from the ‘Working Manual for Rail Staff’ which states….
Brake Vans
A brake van, in which the guard must ride, must be provided at the rear of the train if either :-
(a) the train is to run Class 9(a), non fully fitted (max speed 35mph) or 9(b), unfitted (max speed 25mph
(b) the train conveys toxic gases,
(c) the train conveys hydrocyanic acid,
(d) the train coveys radioactive substances in flasks,
(e) the train conveys Dangerous Goods accompanied by escorts.
Brakevans may also be required for propelling, terminal or other local operational reasons.
In cases (b), (c), (d) and (e) above, the brakevan would not be required to be used in it’s traditional role to assist the locomotive in braking the train, but purely as accomodation for the Guard, to carry out detonater protection in the event of an incident. It being deemed unsafe for the Guard to walk back from the Locomotive under these circumstances in order to carry out these duties.
Tail Lamp and Side Lamps
Every train travelling on the railway must be fitted with a Tail light at the rear, in the case of Locomotive hauled trains, this would be in the form of a traditional parrafin tail lamp, or lattery a battery operated flashing tail light, with second generation Electric Multiple Units, Diesel Multiple Units, and HSTs etc having in-built lights.
In the case of unfitted or partially fitted trains, the tail light would also be accompanied by a pair of side lamps. As their name suggests, a sidelamp is fitted to lamp brackets on the side of a brakevan.
Their purpose is two fold, in the first instance, to shine a white light forward to the Driver and Secondman who would be regularly looking back down the length of the train. A white light would signify the train is complete and all is well.
If the guard required the train to be stopped for any reason, he could place a red lens into the sidelamp, thus shining a red light forward, and in the event of a train division, no light would be seen, in both these cases the Driver would bring the train to a stand for further investigation.
In the second instance, the red tail light would be supplemented by the two sidelamps also displaying a red light to the rear.
Again referring to the ‘Working Manual for Rail Staff’…
Side Lamps
The Guard must ensure that two side lamps are carried on the rearmost brakevan. During darkness, fog or falling snow or when passing through a tunnel, they must show a white light forward. The indication to the rear must be red except as follows:
(a) trains in reverse direction on a bi-directional double line must exhibit a white light on the side next to the other line and a red light on the opposite side
(b) trains on relief or slow line and trains on a goods line or loop adjacent to a main or fast line must exhibit a white light on the side next to the main or fast line and a red light on the opposite side
The Guard must change the side light indications as necessary during the journey. The side lights must be removed when the train has passed into a reception siding.
In model railway terms, it would mostly be impractical (although with modern miniature LEDS not impossible) to adhere to the above instructions, but I think an insight into the use of such equipment can only enhance our interest and add to our knowledge and understanding of how the railway operated.
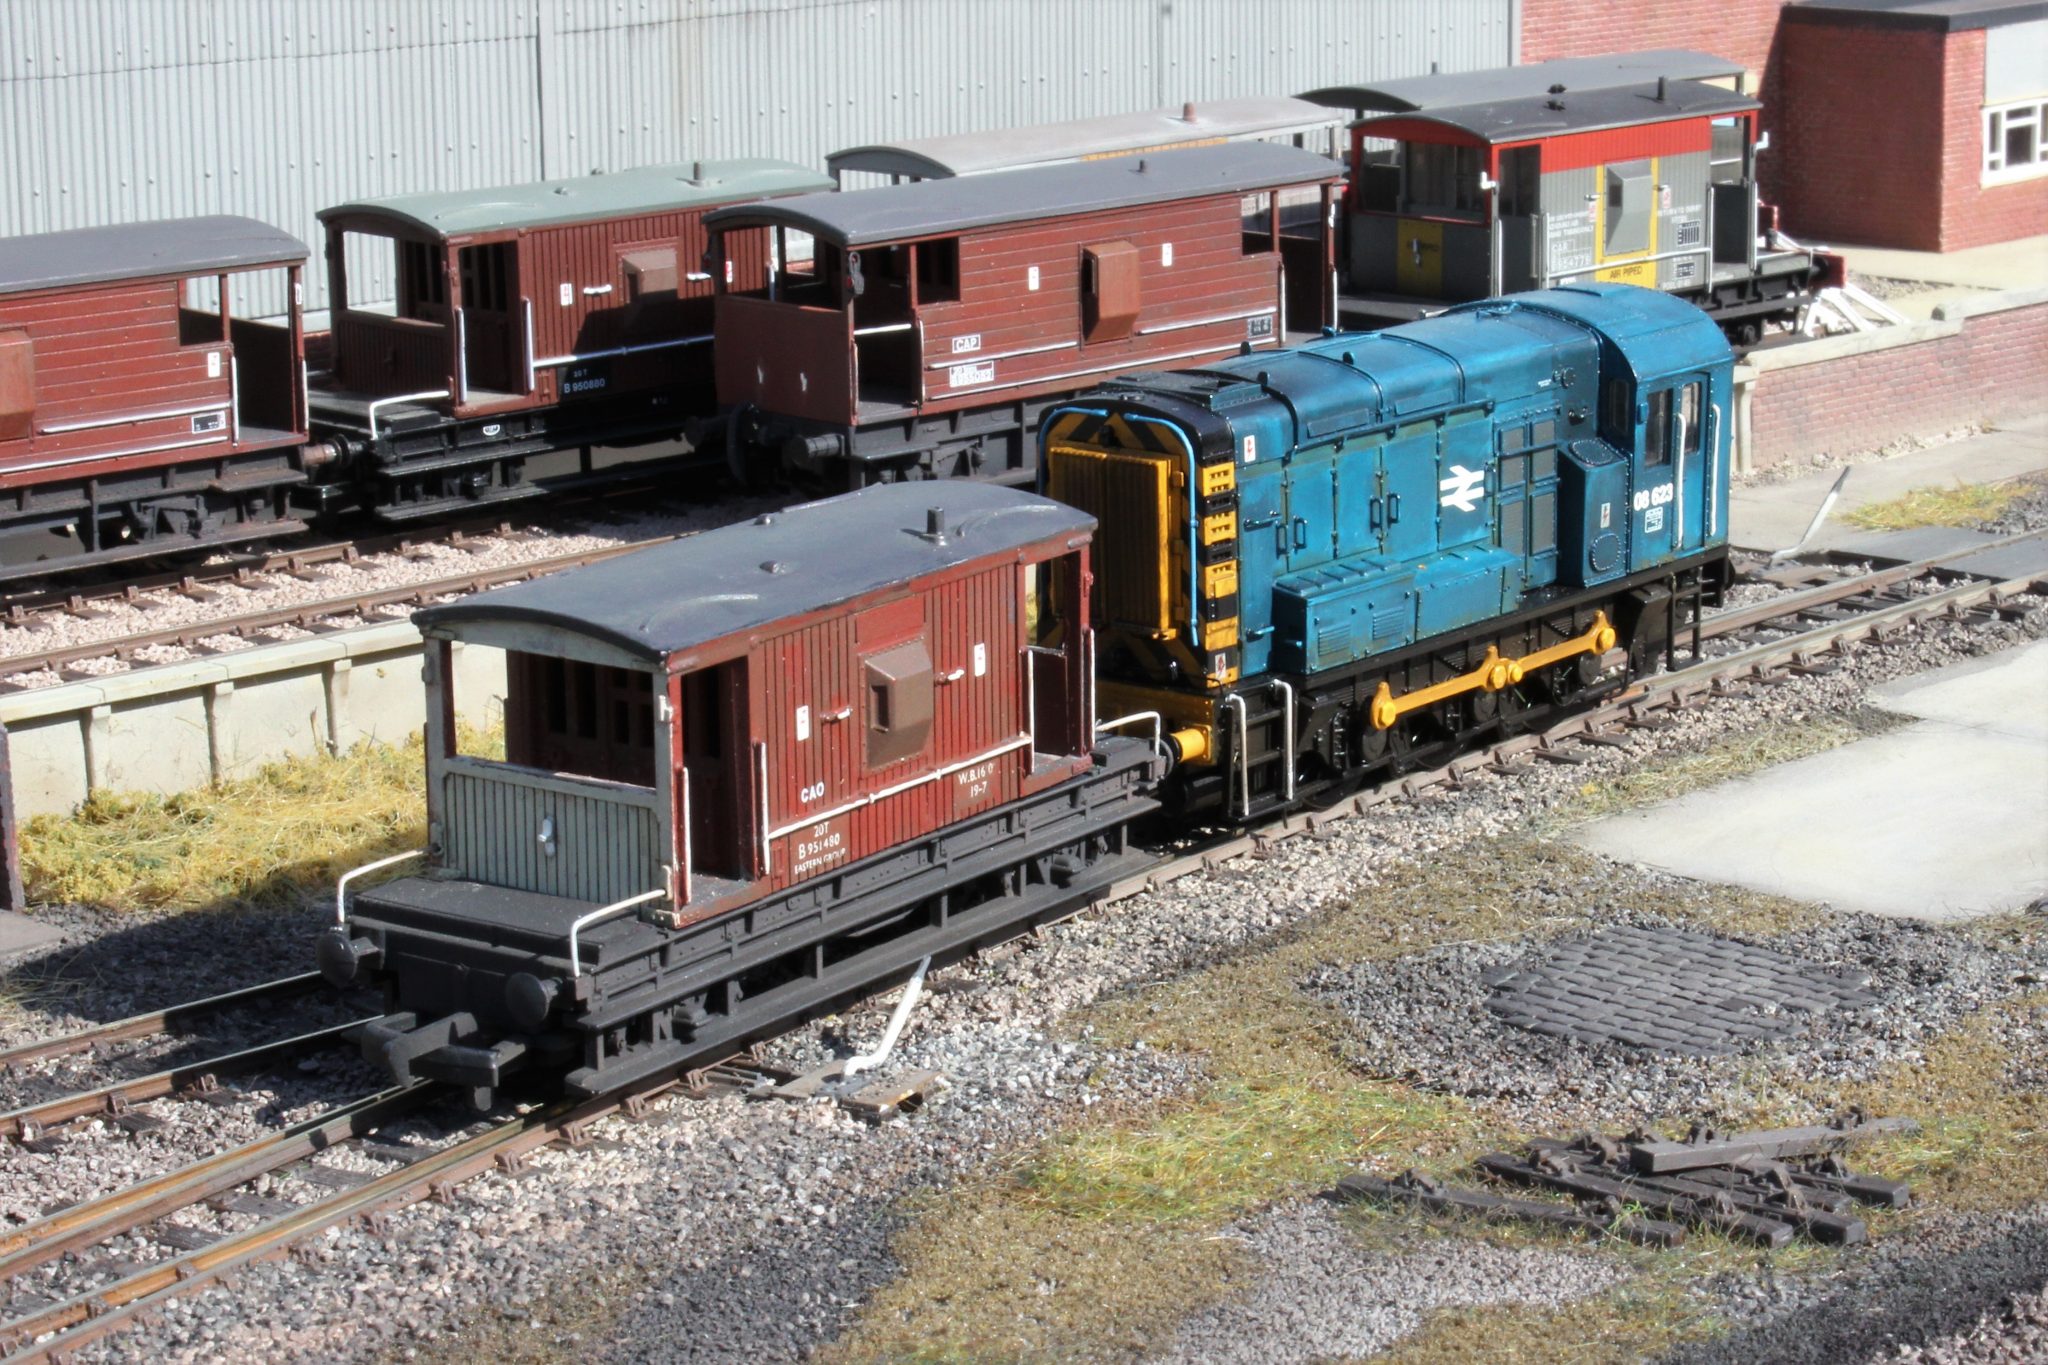
The Models
Brakevans in various forms have been produced by most manufacturers over the years with all having their pros and cons in regards to detail.
Older models (which incidently form the majority of my fleet), can be picked up cheaply on the secondhand market. With a few simple tweaks these can be turned into good looking models – up there with the latest RTR products.
In the first instance I opt to replace the plastic wheelsets for metal, not only does this improve the running qualities but also helps to keep the track cleaner for longer.
I am also in the process of fitting my vans with a screw coupling and appropriate brake pipes to the solebar ends.
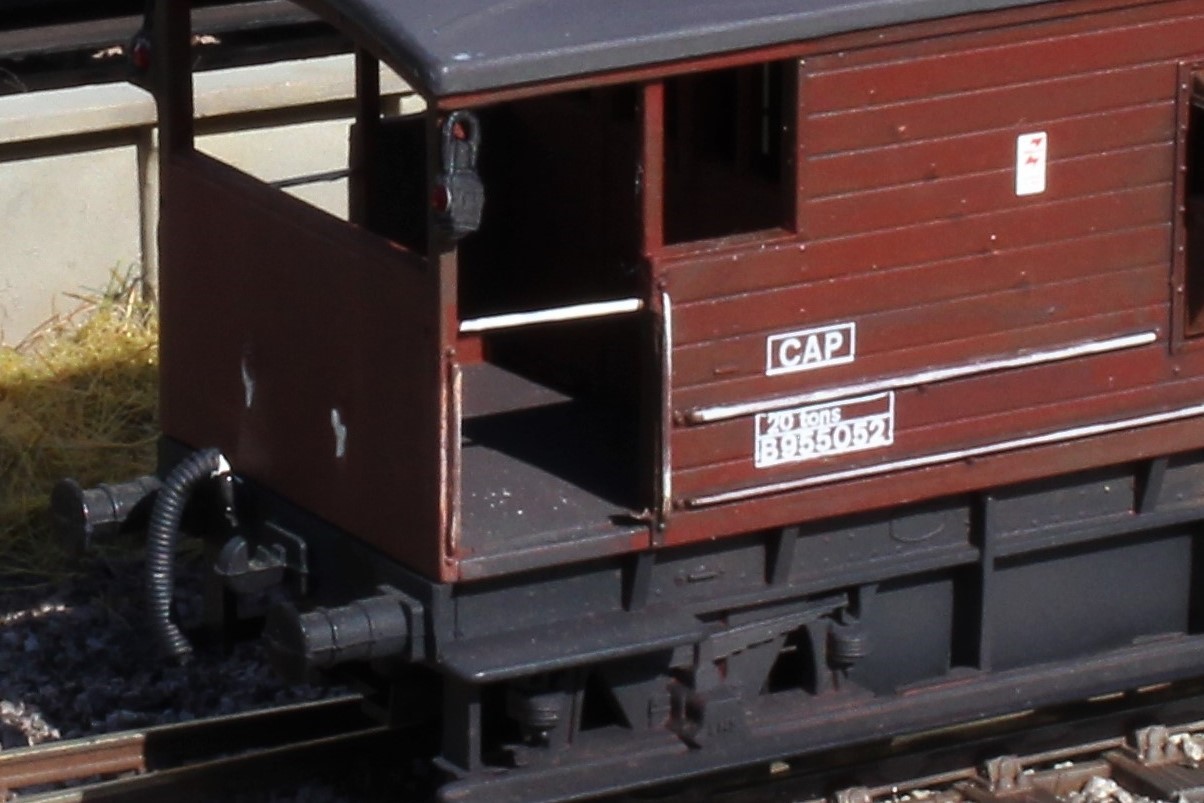
A few of my vans have been fitted with guard rails across the verandah using .45 handrail wire. These guard rails were placed into the raised position by the Guard prior to departure to prevent him accidently falling off the brakevan when out on the mainline. Usually in sidings where the Guard or Shunters would be regularly climbing on or off the van, these would be in the lowered position.
I also have a few former LMS brakevans (Airfix/Dapol/Hornby) and for their age are really well proportioned models.
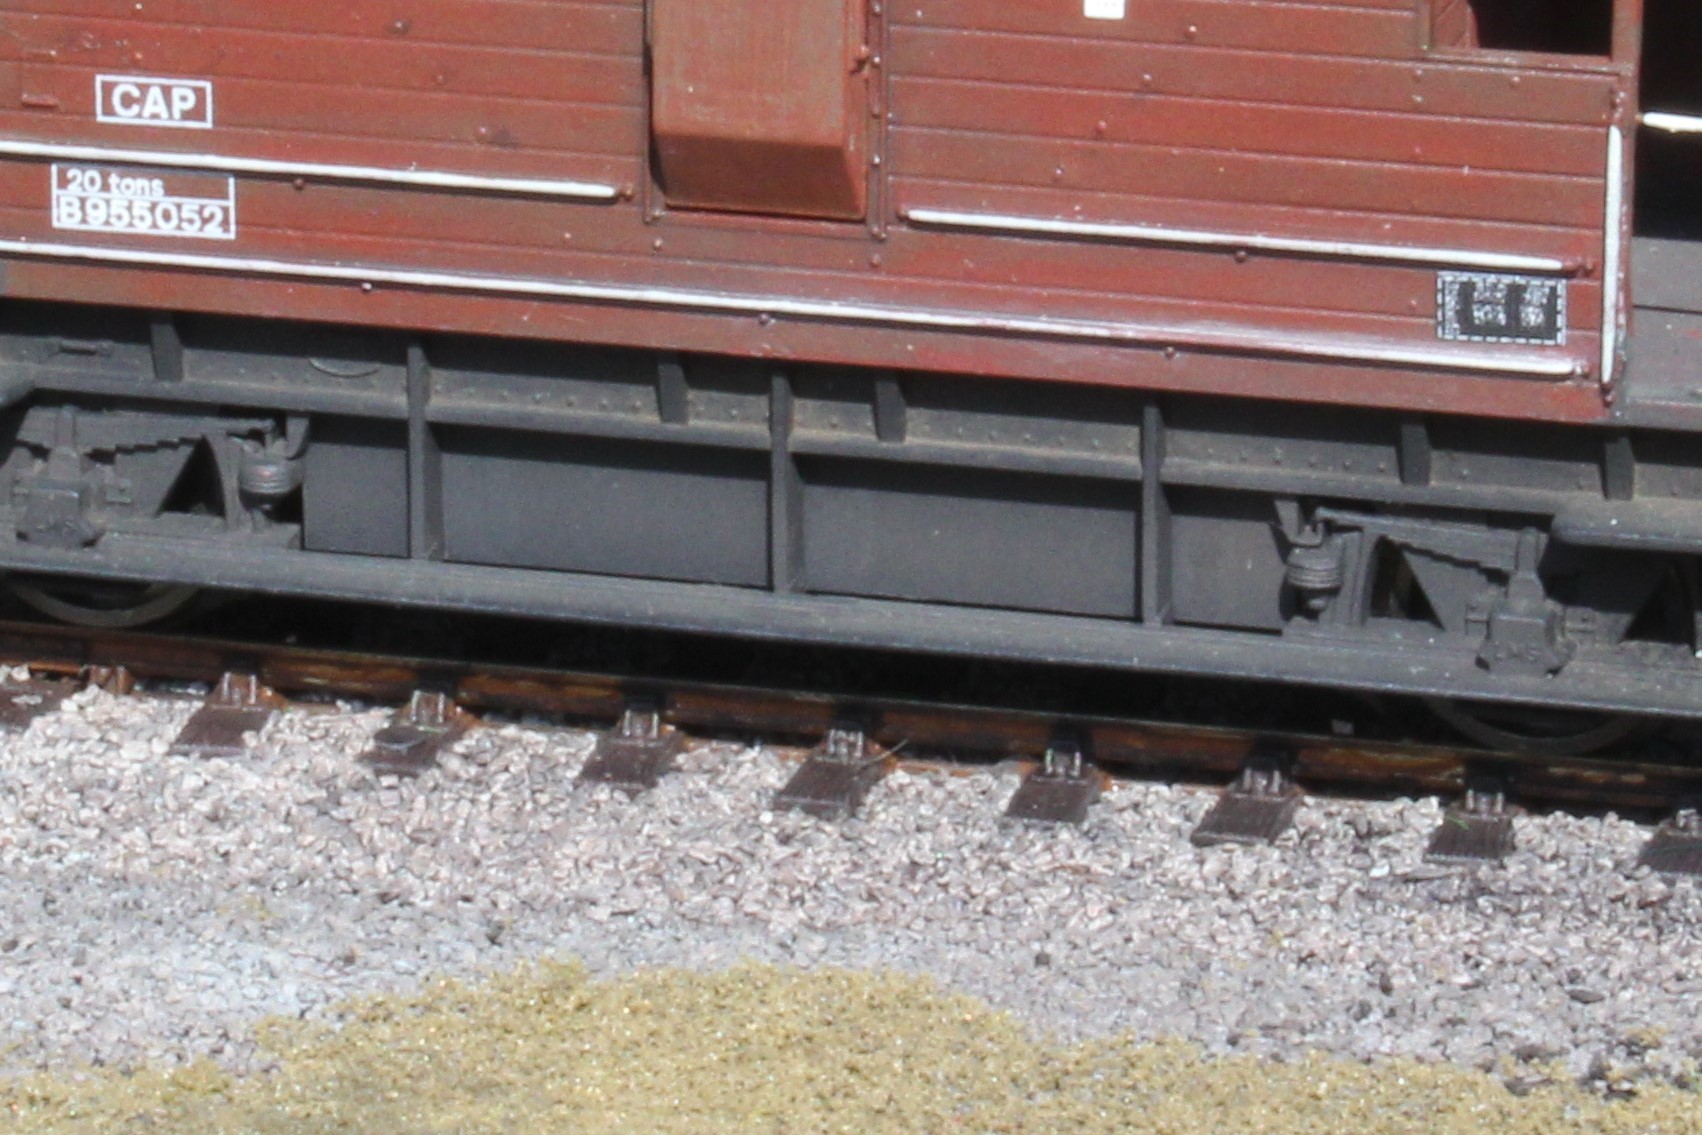
Aside from fitting them with metal wheelsets, I have also added cosmetic ballast weights behind the footboards/solebars using lengths of plasticard, referring to photographs of the prototype as a guide, which again is a simple addition and really enhances the look of the model.
I’m quite lazy when it comes to modelling freight stock, I take the approach that to the casual observer, the Loco pulling the train is the star of the show and is the main focus of the viewer, everything behind is noticed but not scrutinized to the same extent.
Taking this approach can save an immense amount of modelling time, when you consider that a reasonable length train in 00 can comprise upwards of a dozen or more wagons. To model them all in fine detail would take a lifetime – life’s too short!
One compromise I agonized over was whether to replace the handrails or not.
In the end I chose not too, the reason behind this decision was, certainly in the case of the bodyside handrails on the real thing, they are not simply one-piece handrails but several handrails welded at right angles to each other. To model these consistently accurate over several models is beyond my skill set and boredom threshold.
Taking the above into account the moulded handrails on my vans are left in situ. Before painting the model all handrails are painted gloss white, at this stage you don’t need to be too accurate when applying the paint.
When dry the main body colour can be applied to the model, in all cases my brakevans have been brush painted using enamel paint, again, accuracy is not essential, if paint goes onto the handrails this will be rectified at the next stage.
Roughly an hour after applying the main body colour, the top surface of the pre painted handrails are then wiped over with a white spirit laden cloth, leaving a fine looking handrail behind. To me, far more pleasing to the eye than wonky fitted handrail wire !
All my brakevans have been repainted and weathered to varying degrees using photographs of the real thing as a guide, and the addition of correct numbering for the period modelled, as well as T.O.P.S codes and “Electrified line” warning flashes, to really lift the look of these models.
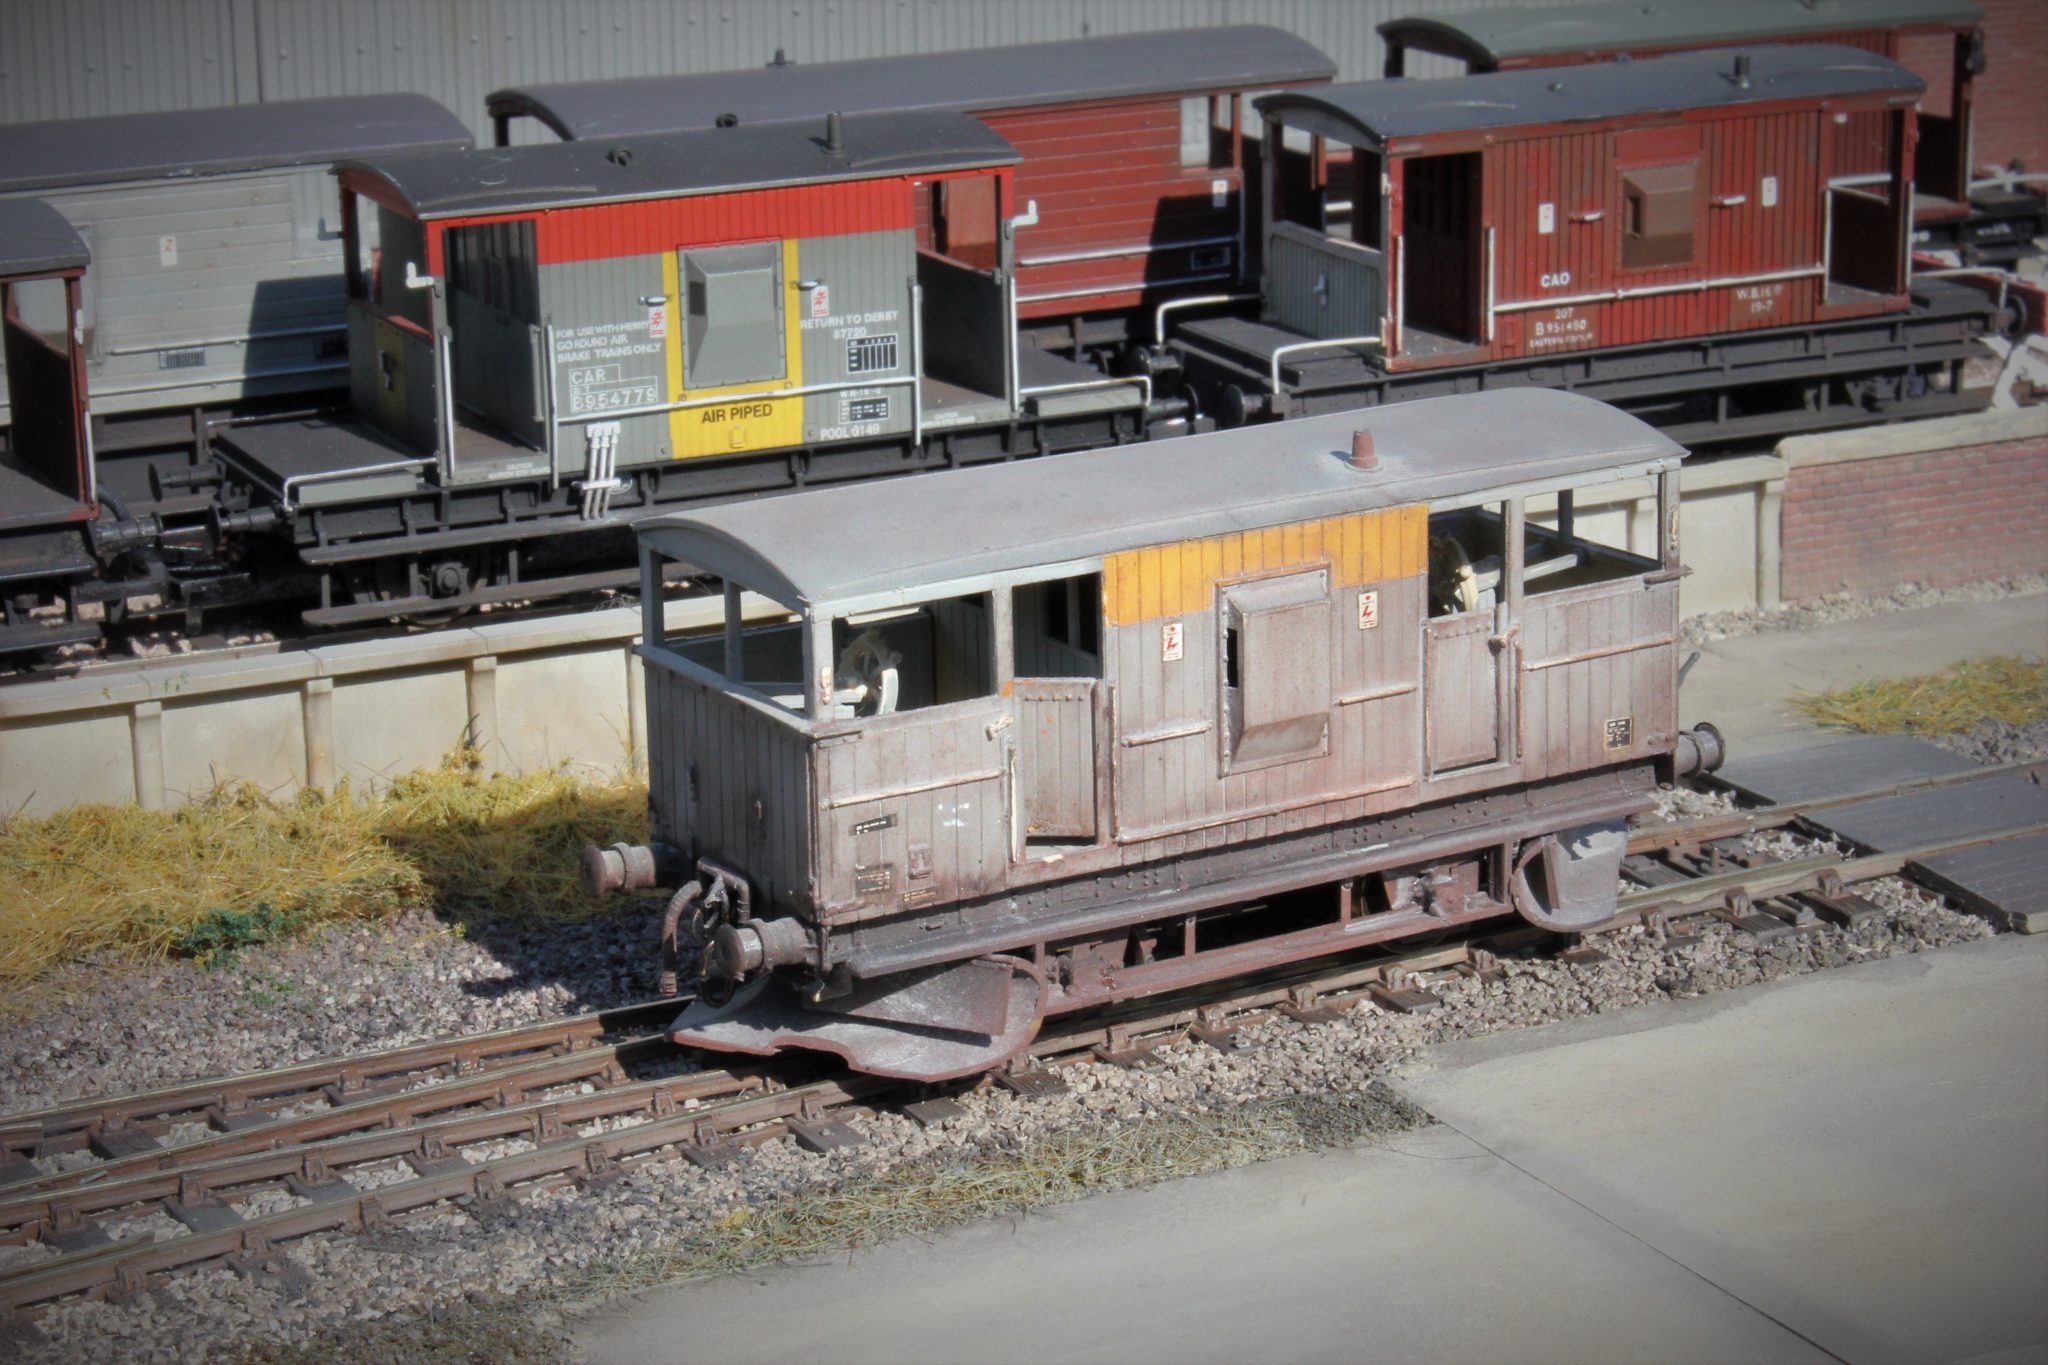
I normally allocate a brakevan to a specific train on my layout, thus if the train is unfitted, it will be allocated a brakevan with a tail light and a pair of side lamps. Similarly if the train is fitted with a continuous brake throughout the van would only display a tail lamp.
In both cases the van would also have the verandah guard rail in the raised position.
Conclusion
I have in my collection far more brakevans than I have use for, but having said that, two or three vans sat at the end of a siding can enhance a scene visually.
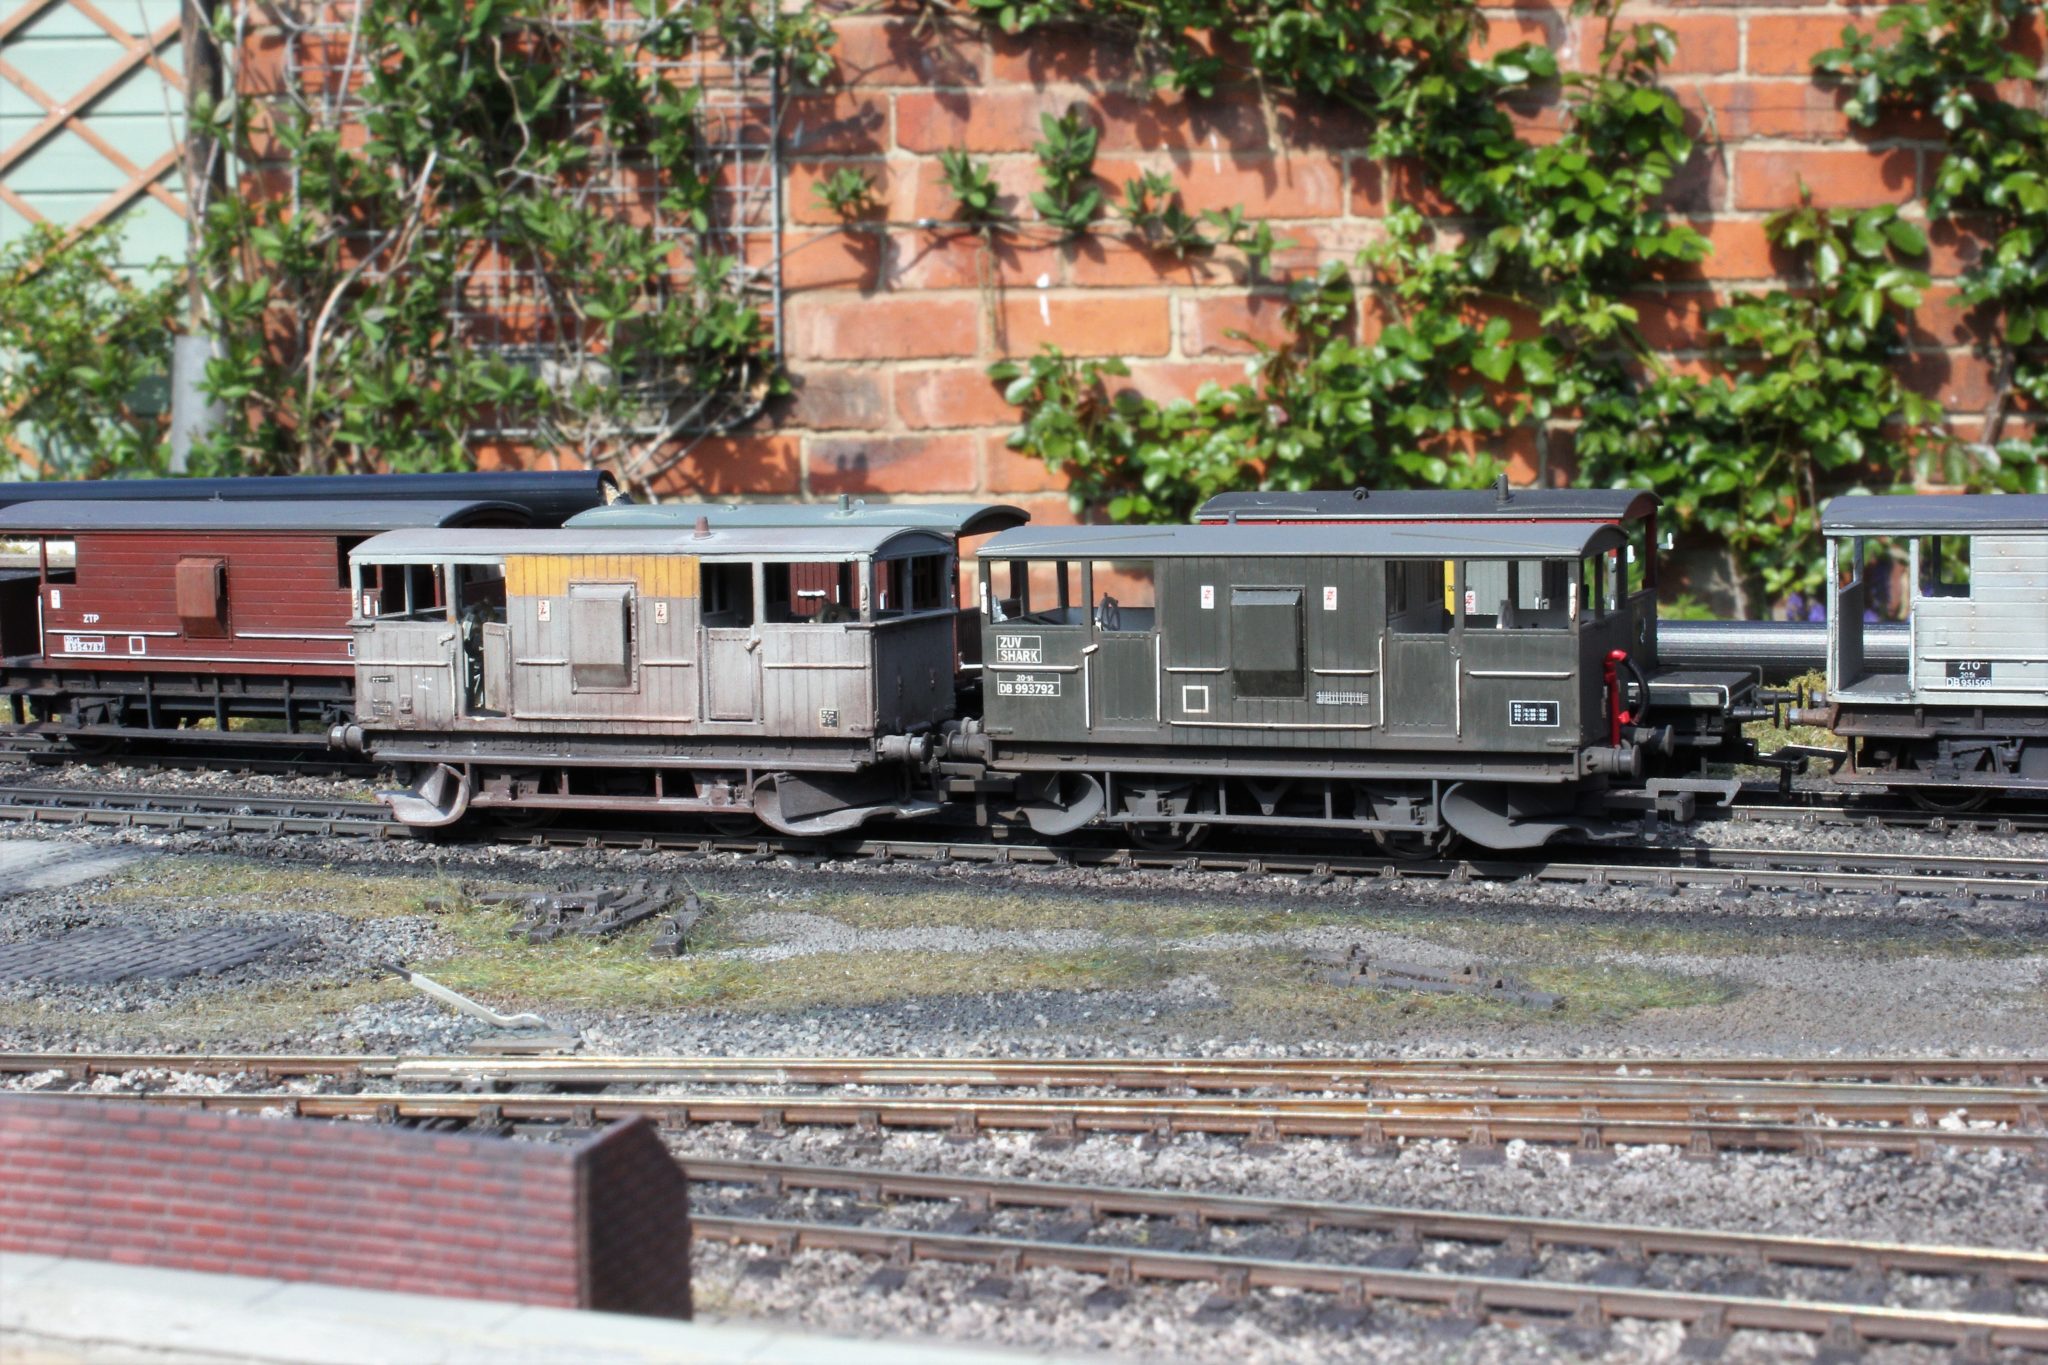
A few evenings work, mostly with a paintbrush can really bring these aged models upto an acceptable standard, and one that doesn’t look out of place when mixed with the latest proprietry models, and at a fraction of the price.