
 Schools Tender Snowplough kit")
")
 Conflat D kit")


The mention of the word ‘Crompton’ in Railway Enthusiast circles usually conjures up visions of the Southern Region’s Class 33 BO-BOs. To railwaymen of the Midlands, a Crompton is a far bigger machine – the 33’s larger cousin, the Class 45 ‘Peak’.
Built at Derby and Crewe works during the early 1960s, the 45s soon setttled down to become a firm favourite amongst locomen. More than capable of performing any task allocated to them, and equally at home hauling the heaviest expresses right down to lowliest of loose-coupled freight trains.
Many a messroom tall story began not with the words “once upon a time”, but usually with “I was on a Crompton……” before a tale of daring-do was relaid to the congregated audience, with the driver and locomotive playing the parts of the “Lone Ranger and his trusty steed Silver”.
Anyone who knows me, will tell you that I have held more than a passing interest (more of an obsession!) with Peaks of all flavours, from Toton’s Class 44’s through to the Brush Class 46’s for a very long time.
So when Heljan announced they were to produce a model, a purchase was inevitable.
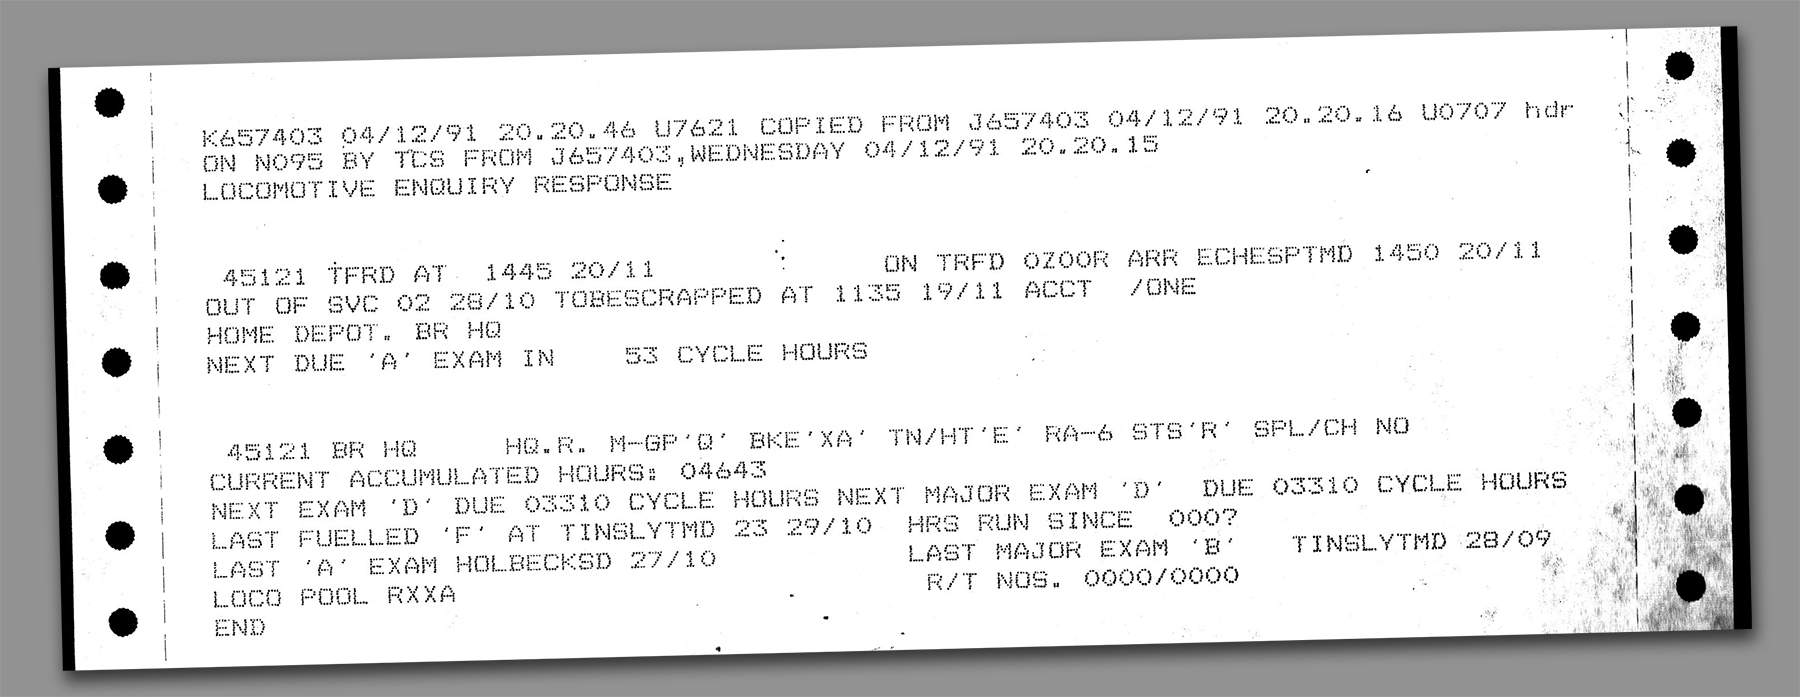
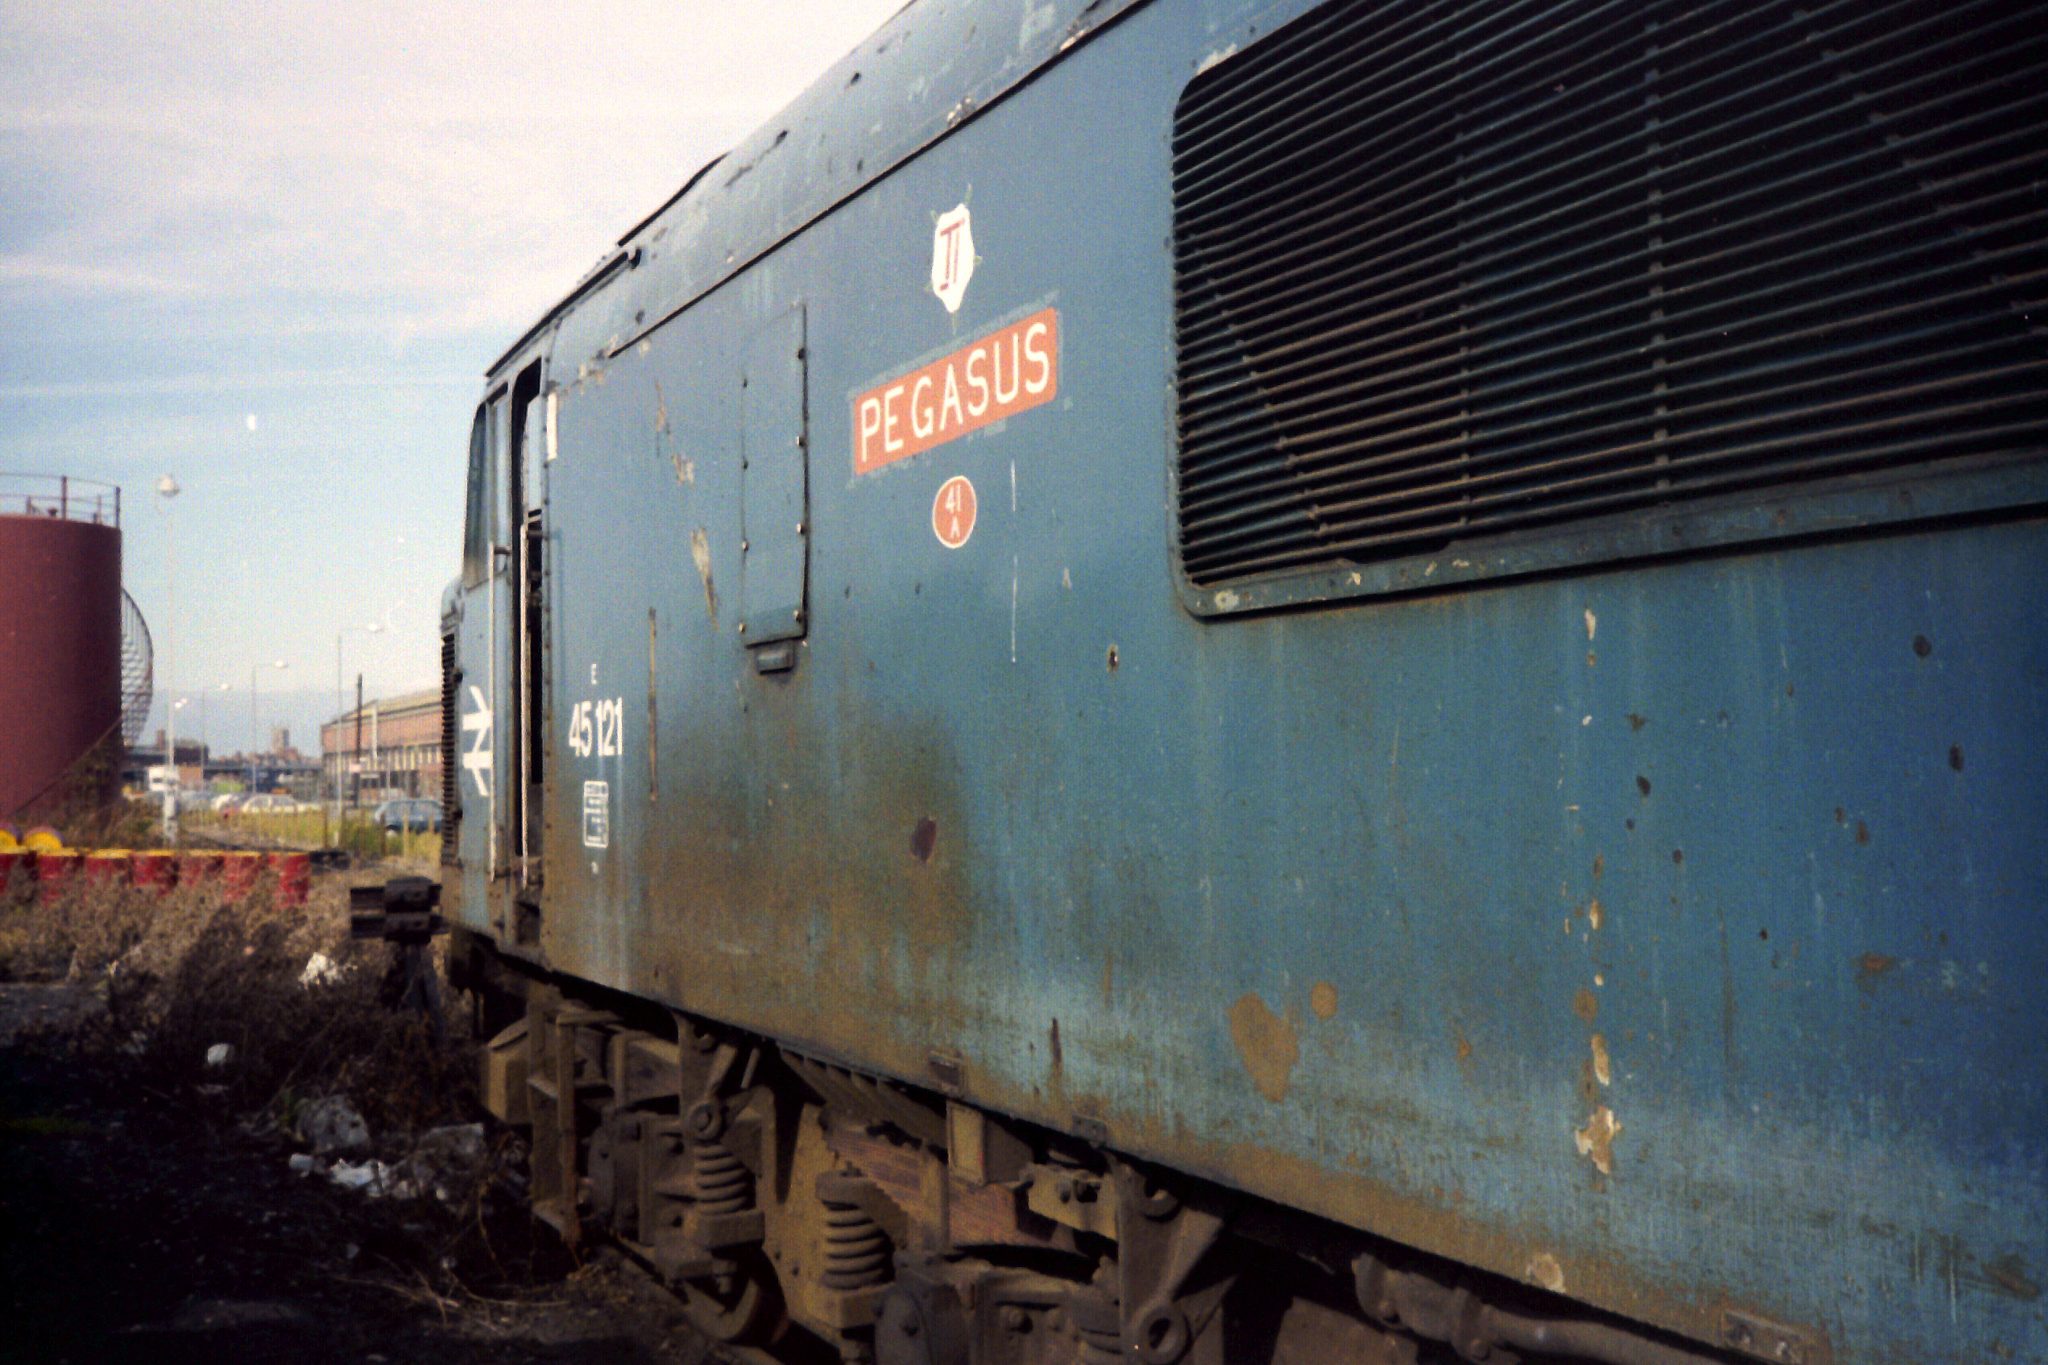
During the early 1990s I was based at Derby Traincrew Depot. At the time, 45121 was dumped at the back of Etches Park sidings, withdrawn from service for a number of years following an all wheels derailment at Healey Mills near Osset. Deemed uneconomical to repair, 45121 was transferred to Etches Park together with 45135 to be used for carriage pre-heating / testing, a task that neither locomotive ever performed. 45135 ‘3rd Carabinier’ was duly preserved, whilst 45121 (unoffically named PEGASUS) remained, gradually being robbed of parts and neglected.
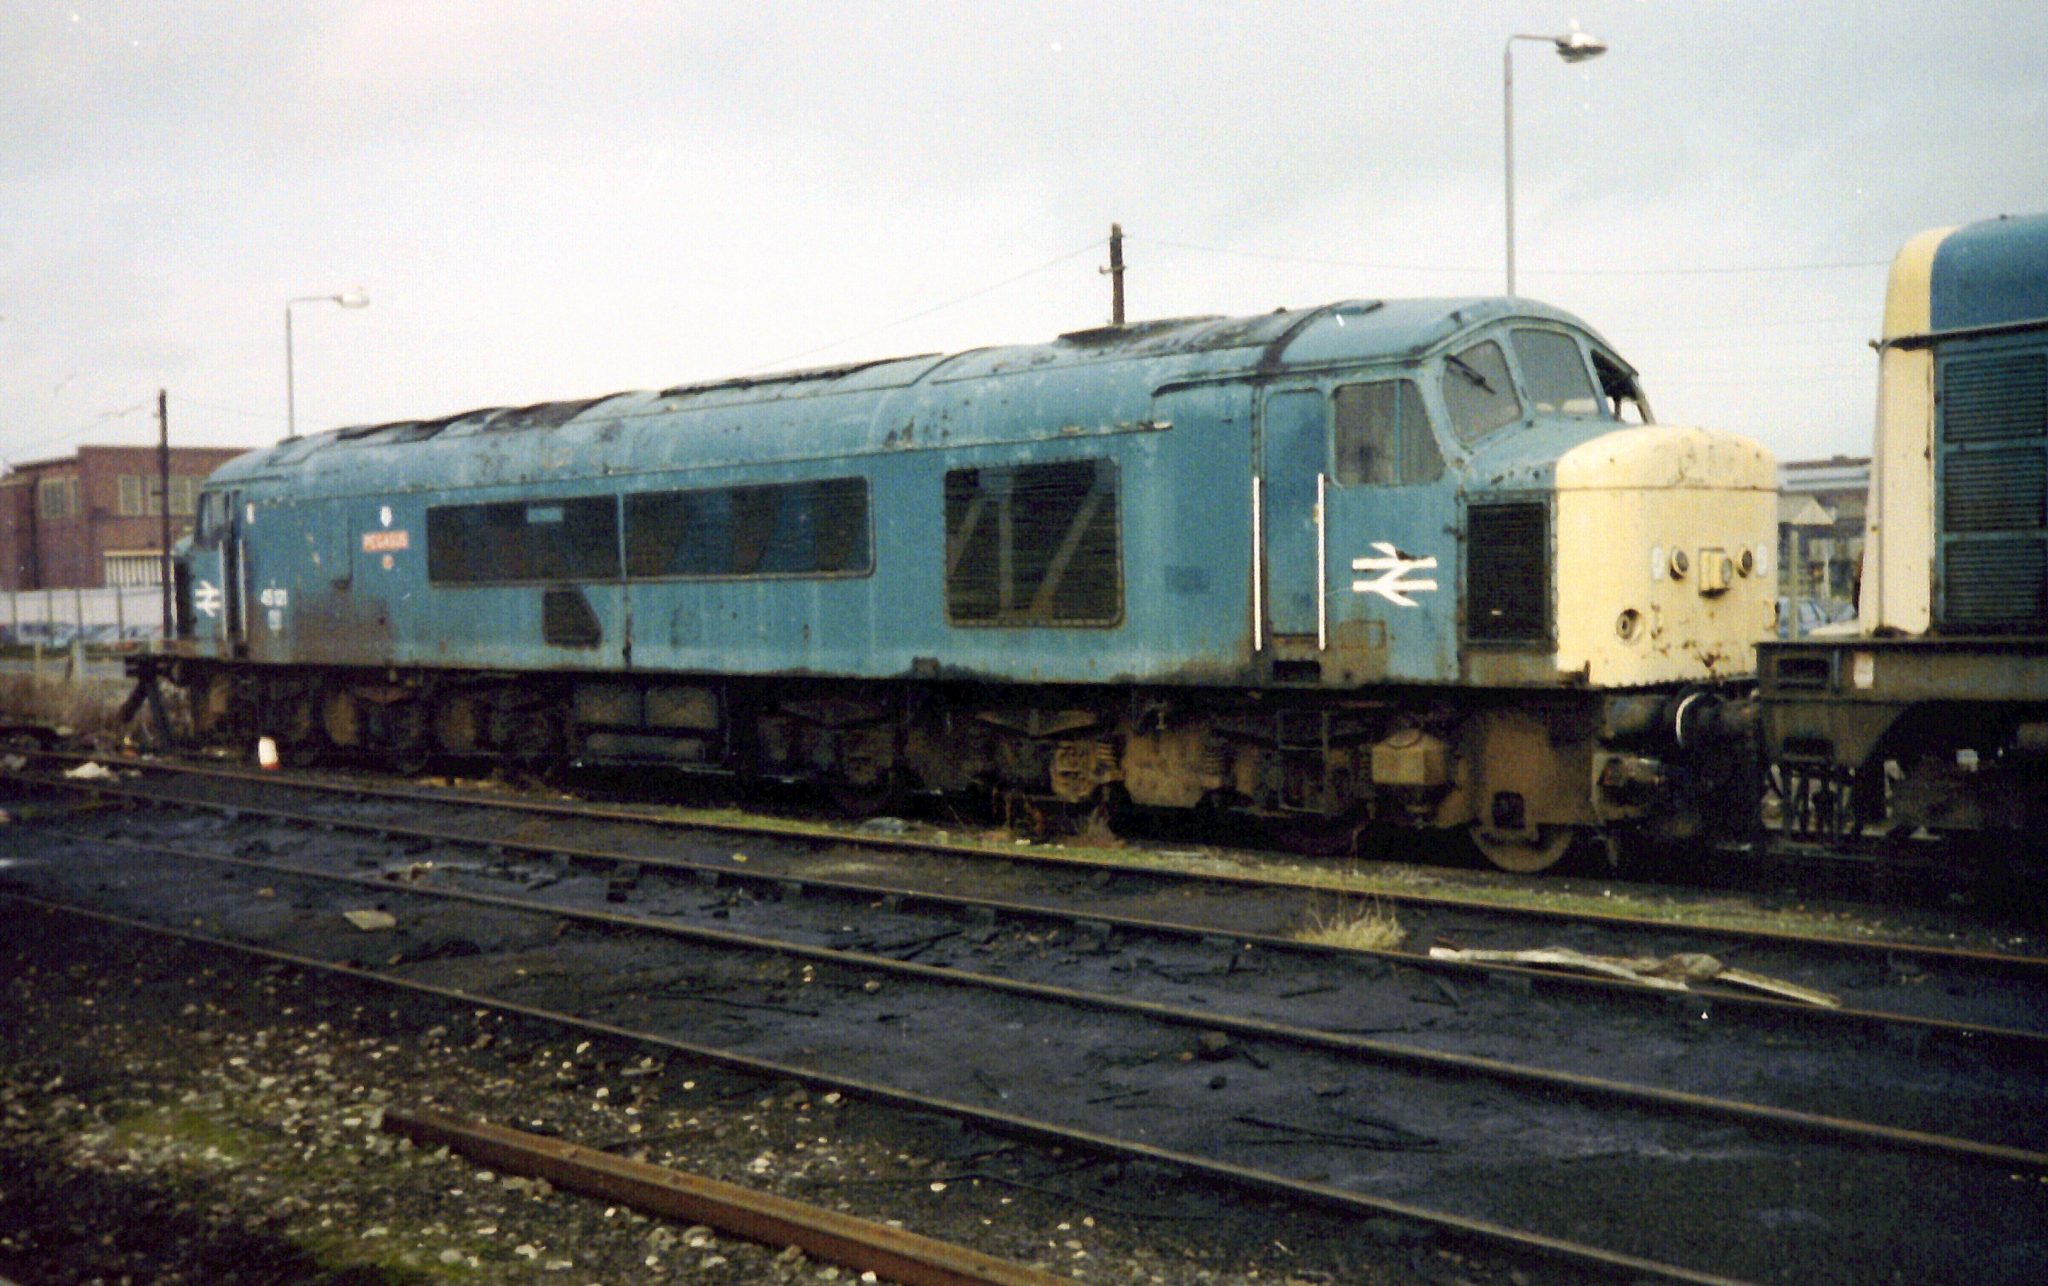
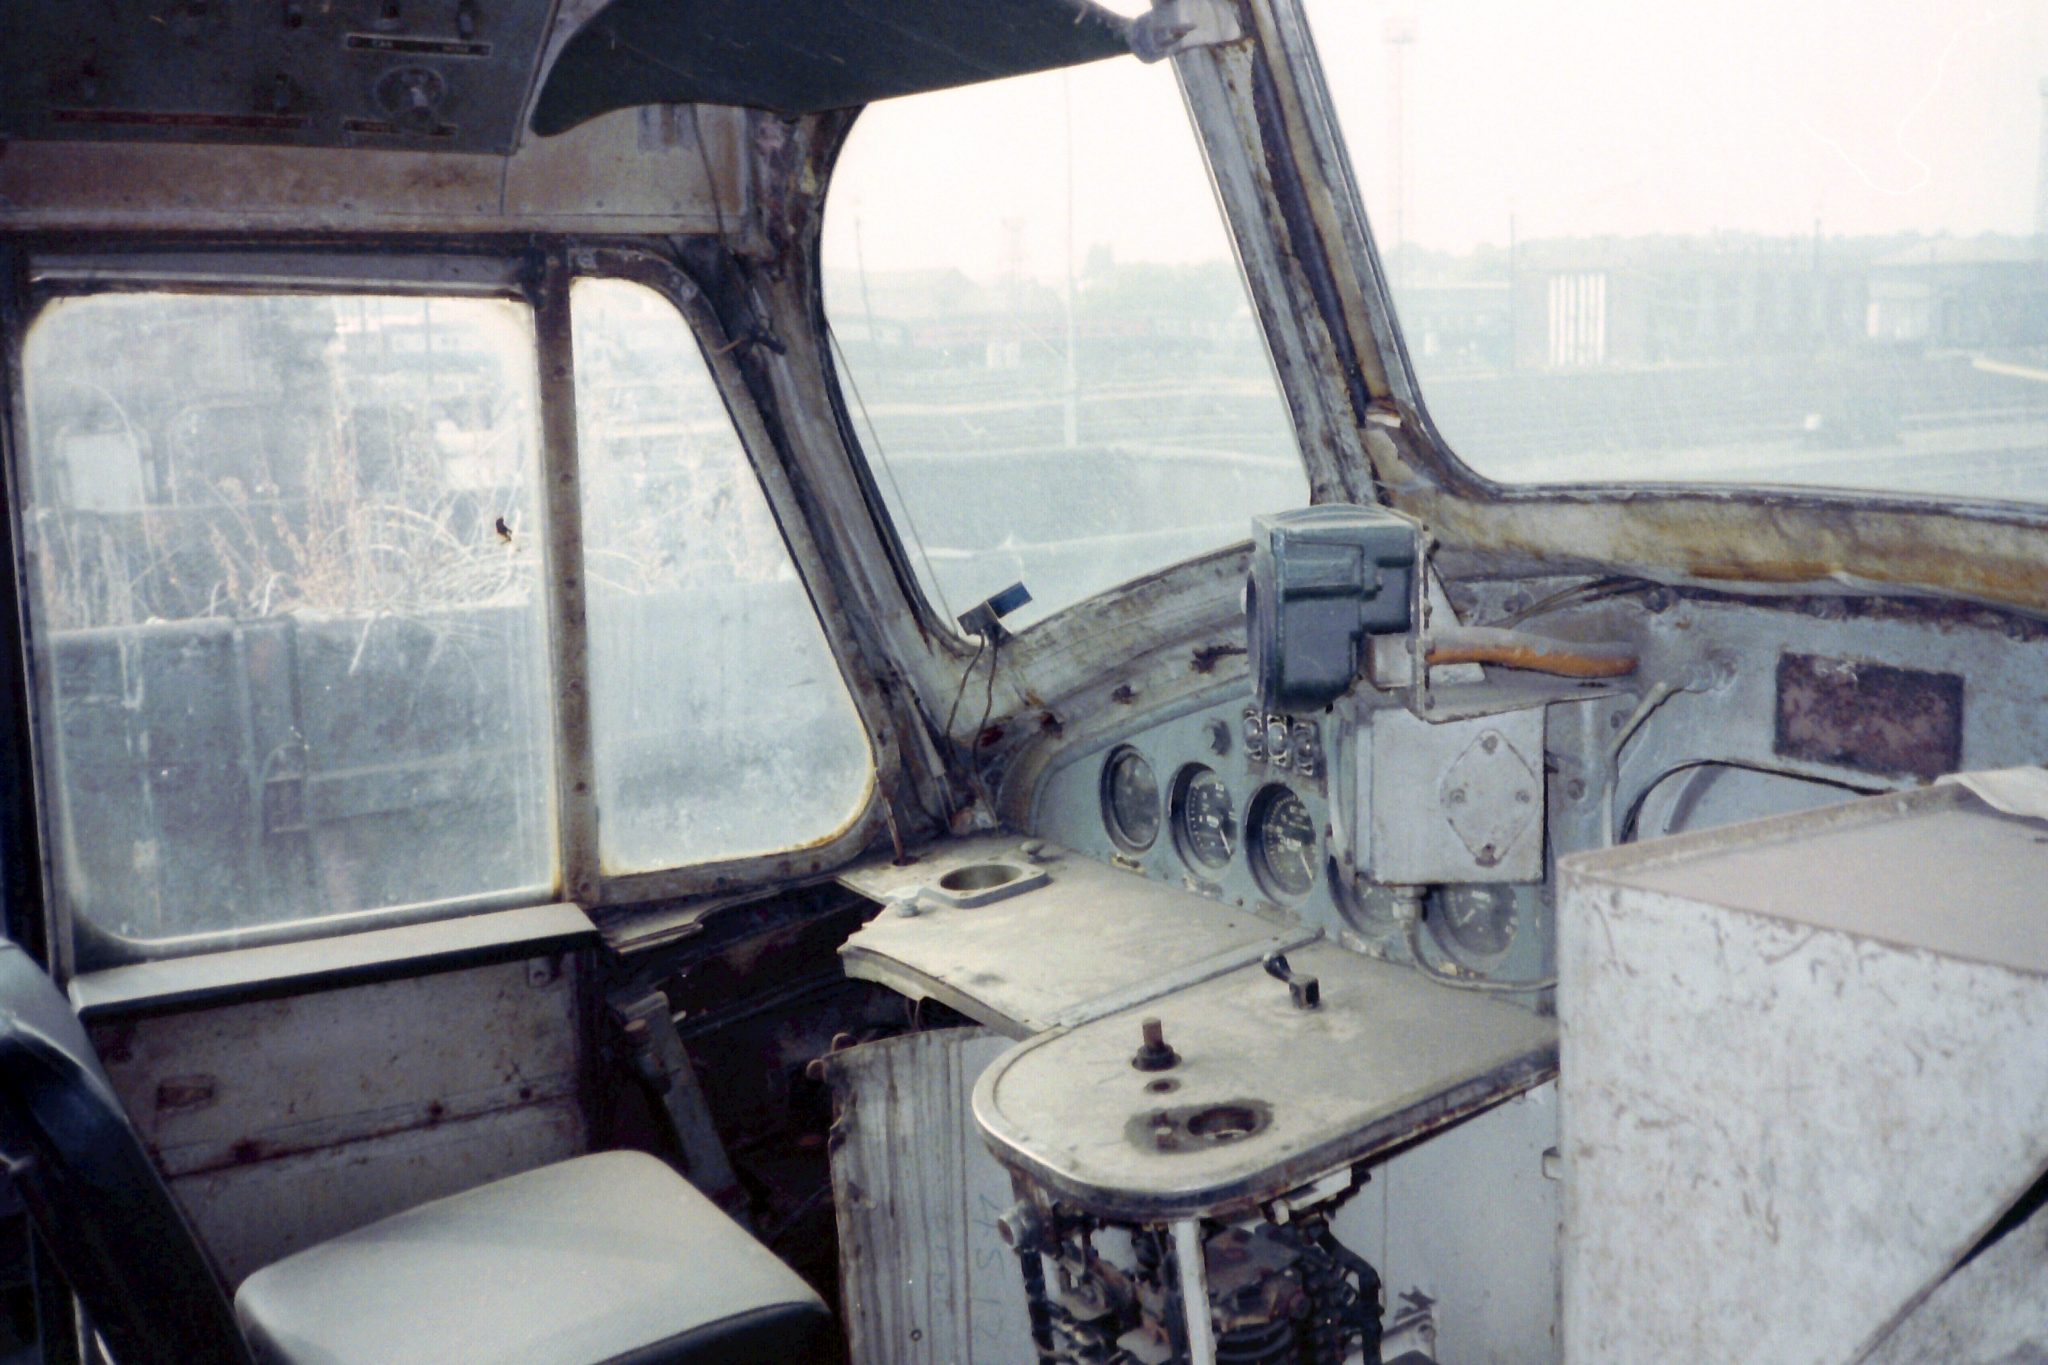
During quiet times, I would often wander down to the siding where 45121 stood, to photograph and explore the remains, to learn as much as I could about the inner workings of this once fine class of locomotive.
Onto the model…..
The Heljan 45 is quite a nice model, though it does have its faults, but in my opinion is a major leap forward in detail over offerings from previous manufacturers.
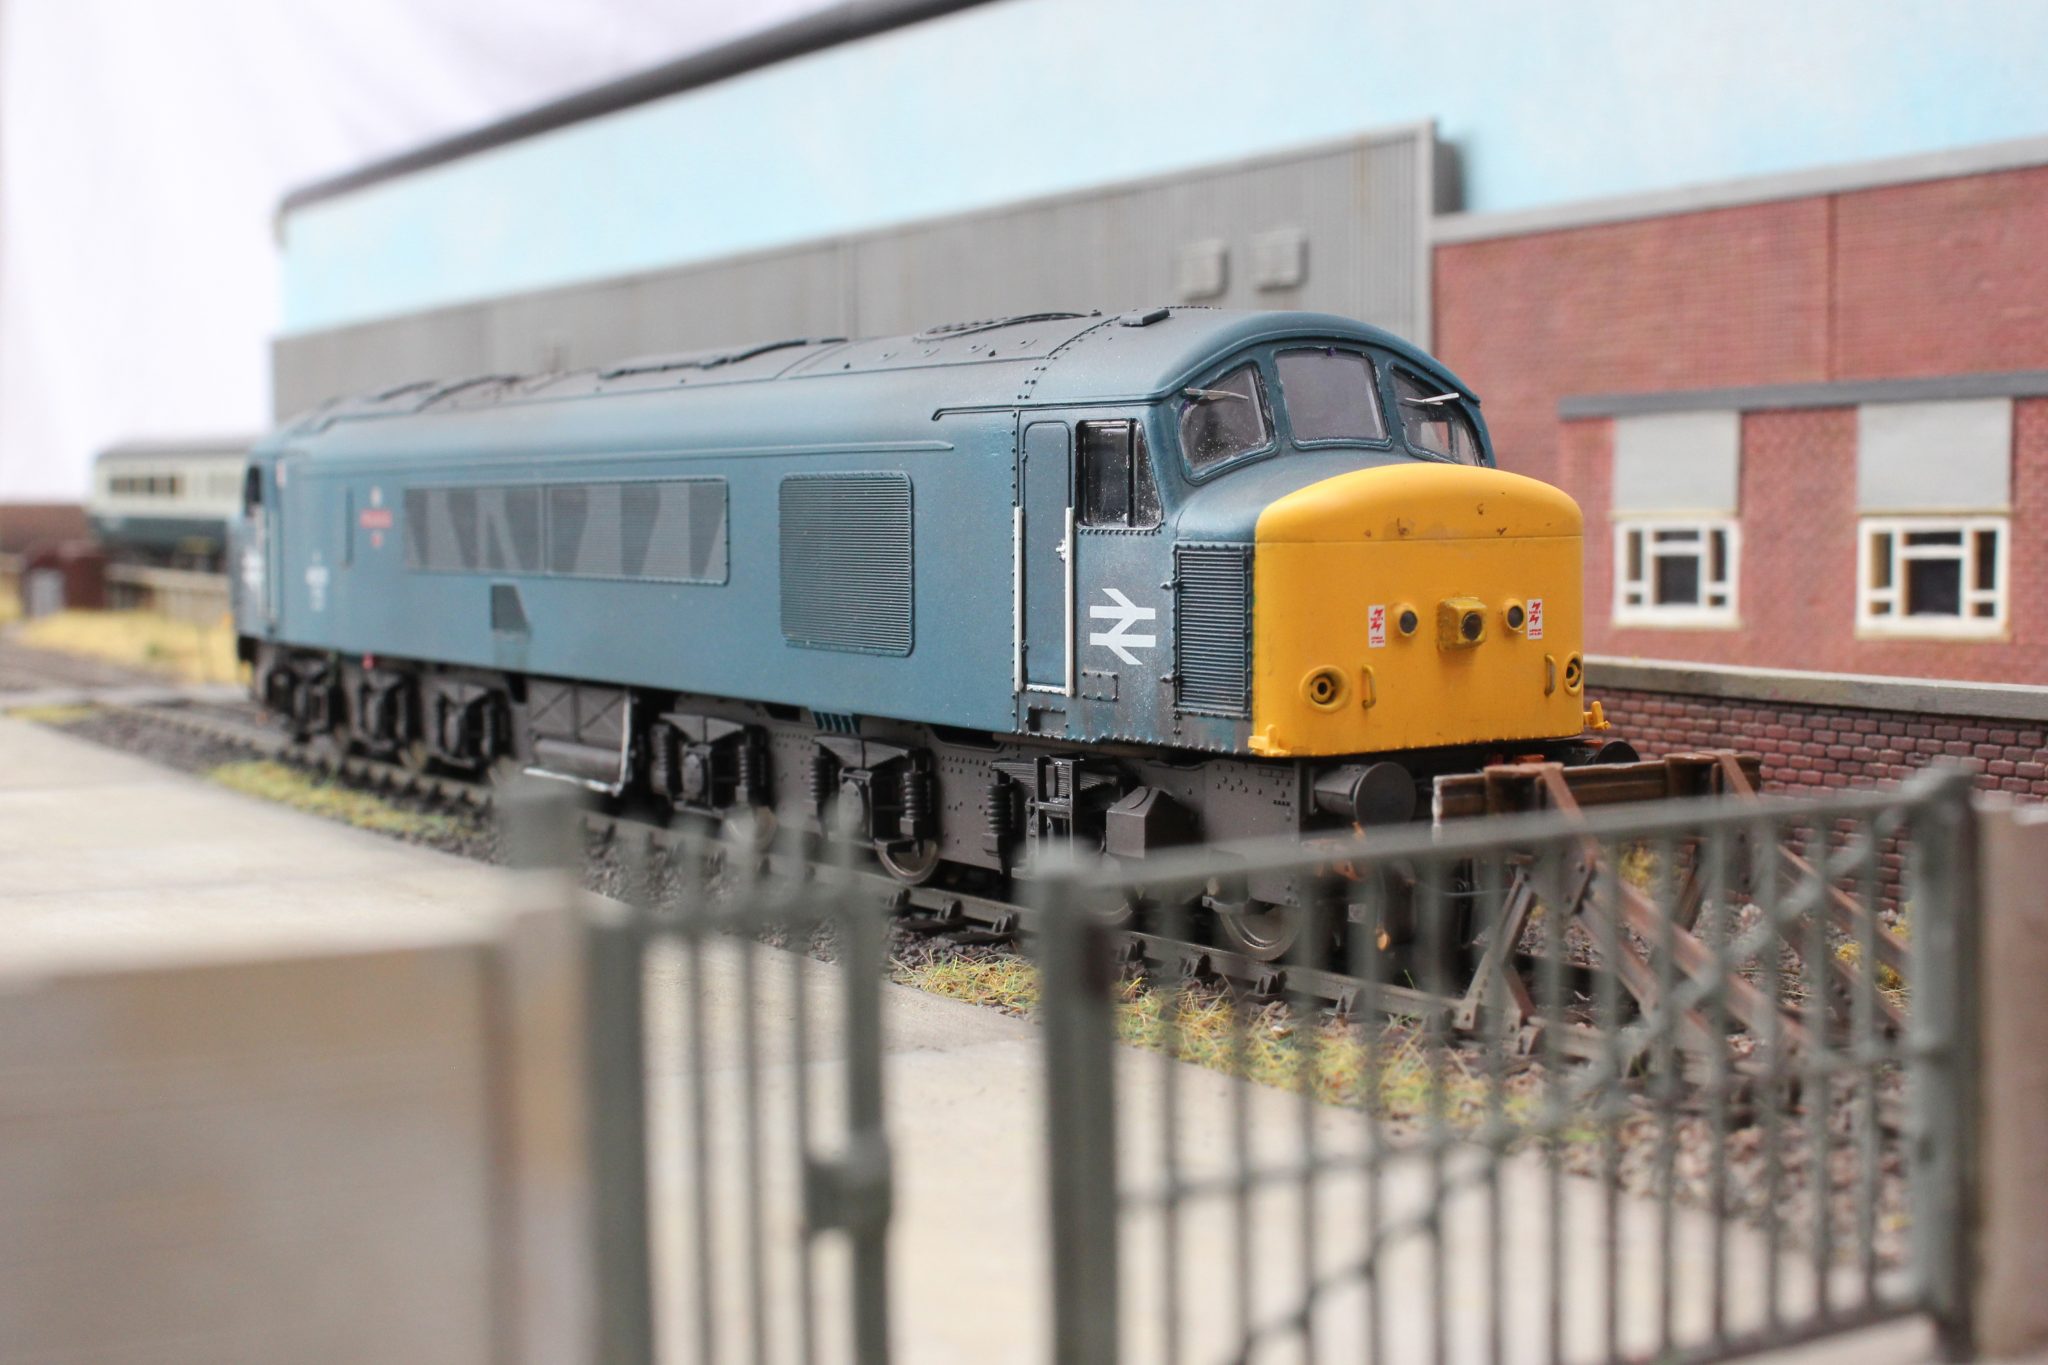
When deciding which loco to model, 45121 became the automatic choice, representative of far happier times than the above sad tale of woe !
Herein came the first (and only) obstacle, the first tranche of Heljan models produced didn’t cater for 121’s combination of headlight and side grilles.
A 45/1 model was purchased with the correct side grille arrangement (namely the mid body triangular grille) and sealed beam marker lights but without the fitment of a centrally fitted High Intensity Headlight.
Luckily (I was only guessing (hoping !)) when I purchased the model that it would have a standard chassis / light box arrangement), it was suitable for the headlight fitted locomotive that I was to model.
A rummage in the spares box found a packet of Replica Railways headlights and a length of 2mm fibre optic cable, that would do the job.

With the body removed, the loco nose ends were measured and marked with a point dead centre between the marker lights and 9mm up from the bottom of the nose end.
A 1mm hole was then drilled out at this point, together with the centre of the “Replica” headlight. These were further reamed out to 2mm to provide a nice inteferance fit with the fibre optic cable, which had been pre trimmed to 5 1/2mm in length.

I would normally remove the glazing before painting a model but, unusually for Heljan, the glazing on this model wasn’t going anywhere. Not wanting to risk ‘fogging’ the glazing by using Superglue, a non-toxic PVA based Glue n’ glaze adhesive was used to attach the headlight casing and fibre optic cable.

Painting
I have always been a strong advocate for the use of enamel paints for painting locos and rolling stock in the past. I find them easy to use, especially for the purpose of weathering, where a stroke with a white spirit laden paintbrush can bring out the most pleasing effects. An advantage I find with enamels is, even after several days of drying, any mistakes can be rectified or alterations made to a model, again with the use of white spirit and a paintbrush or cloth.
Of late I’ve found enamel paints from certain manufacturers increasingly unreliable, once a tin is opened it isn’t long before the paint turns into an unusable gloop, certainly no good for putting through an airbrush.
For the model of 45121 I elected to use acrylic paint – a first for me!
The factory paint finish on the Heljan model is a little on the thin side, with bare plastic showing through in some nooks and crannys. Also the shade of blue is a little on the dark side.
On the model, all the side grilles were masked up, as these only required weathering. The nose crown and cab sides were also masked with tape, and the glazing masked up using Maskol.

Railmatch BR Blue acryilc paint was used, with just a couple of drops of white added to bring a slightly faded / weathered finish. This was thinned down to a milky consistency using acrylic thinners and a few drops of Valejo Flow Improver, for spaying through the airbrush. When spraying enamel paints with an airbrush, I find a compressor pressure between 20 and 25PSI gives a nice even and controllable paint flow. With acrylics this was increased to 35PSI. I was pleasantly surprised with the ease of use, and the fast drying times of acrylic paint are a massive advantage, allowing several coats to be applied in quick succession. At the same time various shades of black weathering was selectively applied to the roof area. Where transfers were to be located, a thin coat of gloss varnish was also applied.
All transfers came from a mix of Railtech, Precision Labels and Fox transfers and applied following manufacturers instructions. After leaving to properly set overnight, the lightest coat of satin varnish was sprayed over the transfers, and following the re-masking of the glazing, the whole bodyside was treated to blast from a Humbrol satin acrylic varnish rattle can.
Finishing
For the final stage, the masking over the side grilles was then removed, and the thinnest of mixes of matt enamel black paint and white spirit was run through the grille detail. There then followed a session of weathering with a paintbrush and acrylics, using photographs of the prototype as a guide.
The body was then re attached to the chassis ( this had also seen the attention of the airbrush ) and a full test of running and lighting functions was made.
Conclusion
The whole project took a little over a week to do, thanks mainly to the quick drying properties of acrylic paint, I must say that I am now a convert to the use of these paints, if I had elected to use enamels, the project would have taken much longer to complete.
This was a very enjoyable project, and I now have a model of a locomotive with a personal connection.
More photographs of the completed model can be seen in our Class 45 Photo Album.


